
Vintage Halloween Owl Faux Stained Glass Vase
The look of stained glass is so pretty, but stained glass itself can be a very expensive hobby and labor intensive to learn to learn. Luckily, there is stained glass paint that mimics the look of stained glass that can be used to create fun projects and gorgeous home decor. We used stained glass paint and a hand towel from the home store (as a pattern) to create the stunning vase that can be used,not only as a vase ,but we used it as a battery operated luminary. While we used a disposable hand towel, quilt patterns also make great templates for creating faux stained glass art. We will give you the step-by-step here we used to create the project and the supplies so you can also create your own gorgeous stained glass work of art of your own!
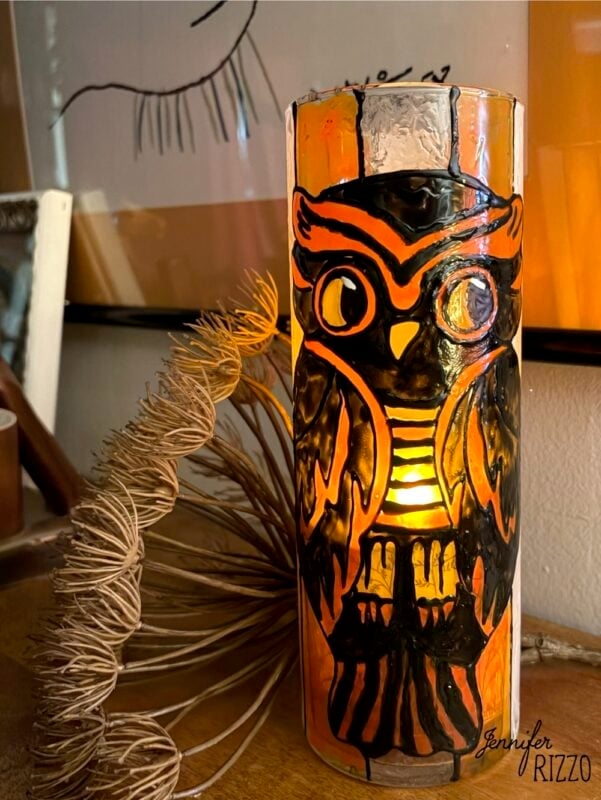
Supplies Needed for a Vintage Halloween Owl Faux Stained Glass Vase
-A pattern (we used a disposable hand towel)
-Stained glass paint and 3D acrylic paint or a acrylic lead paint writer
-a surface such as a vase or an clear acrylic board
-Tape (to hold the pattern in place)
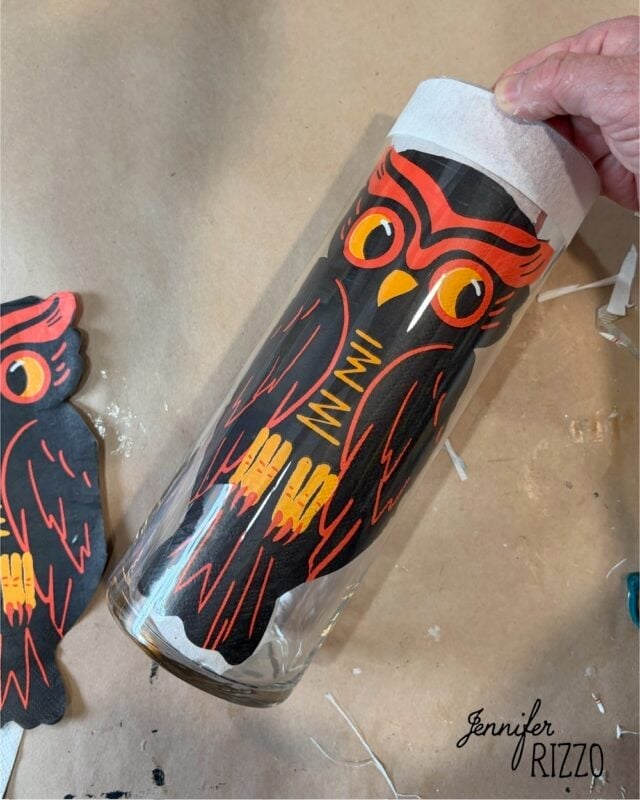
Tape the Pattern to The Inside (or backside) of the Vase
Whatever surface you decide to paint your stain glass paint onto, the pattern gets taped to the underside of what you’re painting on. This way you can use your pattern as a template to draw right over and create your stained glass work of art easily.
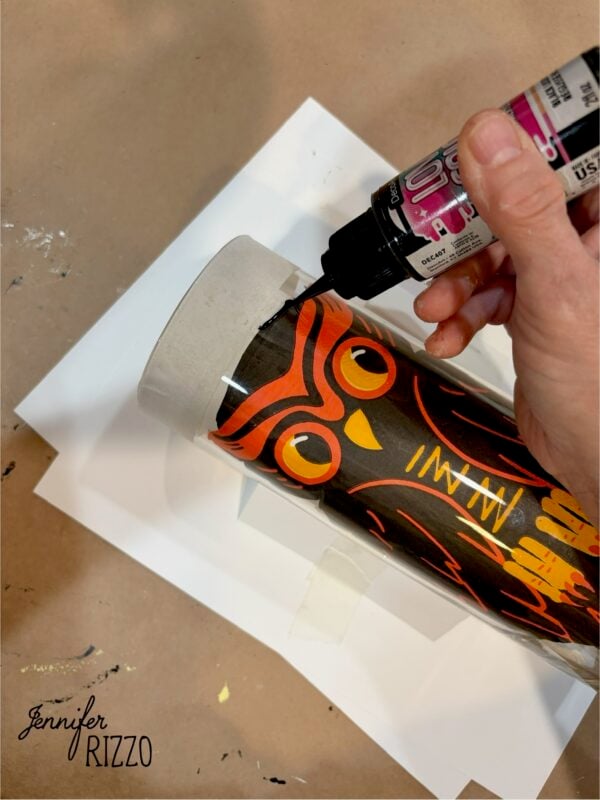
Trace Over Your Pattern
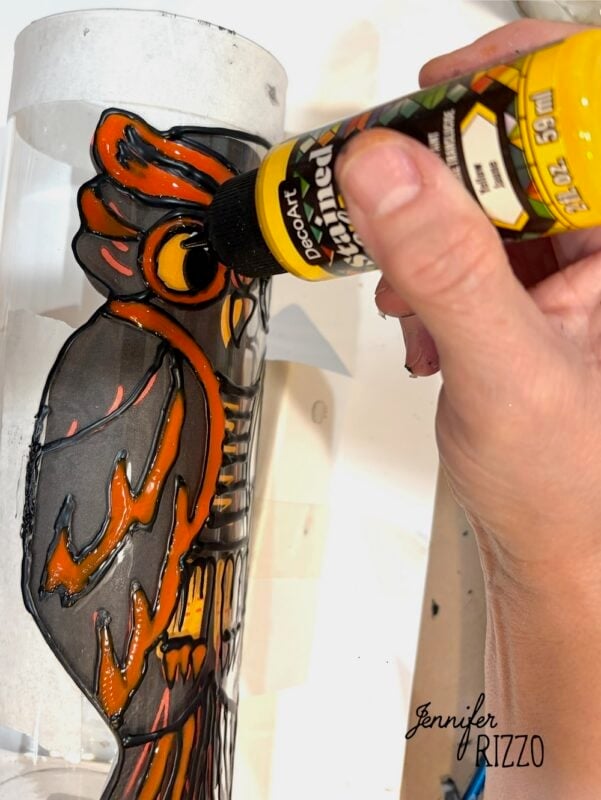
We used the Decoart faux stained glass paint that we used comes with a bottle of faux acrylic leading paint to mimic the lead lines of real stained glass. These also create a boundary when flooding your stain glass paint and help to keep it where you want it to go. We used a 3D Decoart writer in the Love Color line because it was just a little darker than the faux stained leading which had a slightly gray cast to it. We used the 3D writer to outline the entire pattern. If using a curved object like a vase, make sure to secure it to keep it from rolling. We also found it helped to work on one side to let it dry so it doesn’t run, and then turn it slightly to work on the other side. To clean up any areas or rough paint lines, use a slightly wet cotton swab that look a little messy our out of the lines. Let the faux lead dry before moving onto the next step of the faux stained glass.
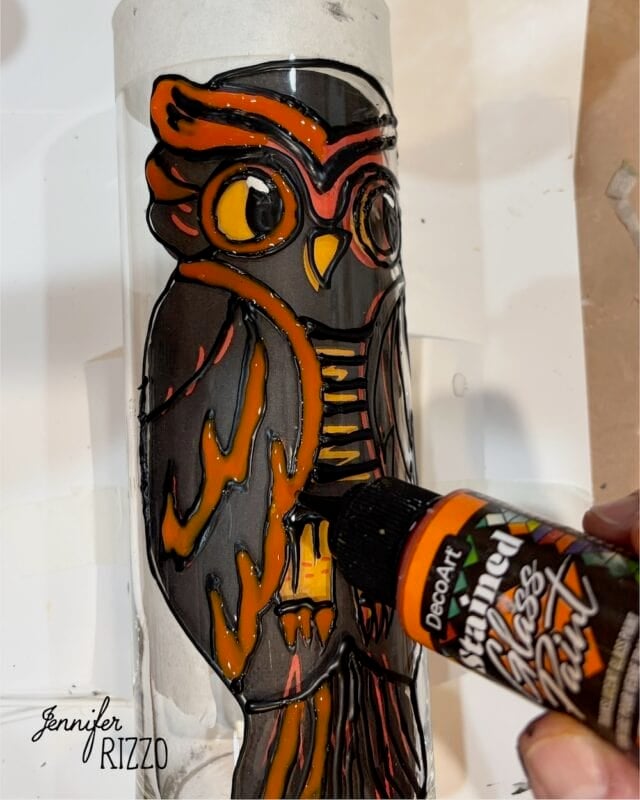
Use the Faux Stained Glass Paint
Use the faux stained glass paint to fill in the areas between the leading. We found it helps to squeeze the paint out onto surface and then agitate it slightly. It seems to find it’s own level. It’s better to apply it in thin coats and apply more when dry than add single thick coats. Color the entire design in and let it dry over night.
Remove the Template
Remove the template underneath. It’s important to remove the template. Sometimes and area will look complete filled in and then when the template is removed, it’s easy to see areas that need to be touched up! Touch up right over the areas already painted, letting it dry between coats until the desired depth of color is achieved. Let dry for at least 24 hours.
Follow the Directions on Curing
Depending on the brand of faux stained glass paint used, the directions for curing and durability will be different. Make sure to follow the directions to make sure it holds up as well as possible!
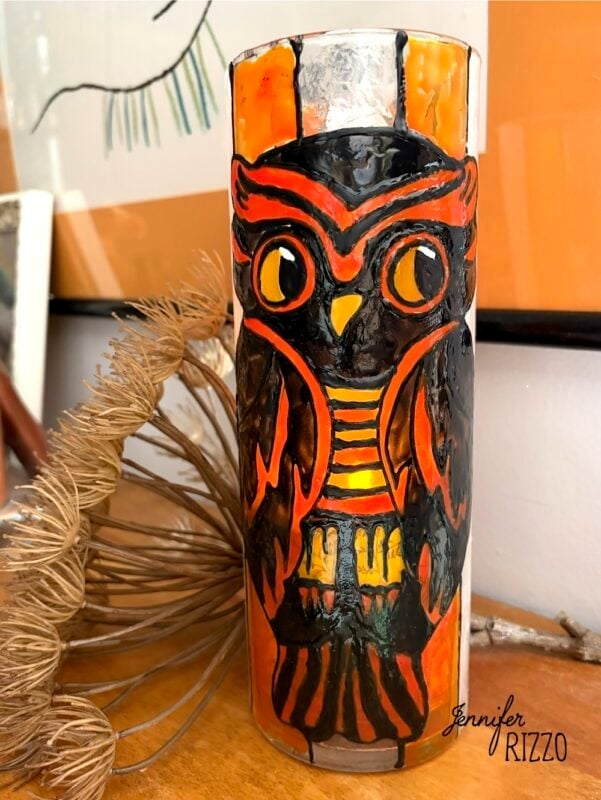
Decorate!
We used ours with a battery operated candle to create a fun and vintage -inspired luminary. It’s so cute at night and with a battery operated candle with a remote it’s easy to switch it on and off! Twinkle lights or a glow stick would also work! This project would also be cute to make at the holidays with a snowy winter scene and would make a fun gift! It would also be pretty with a fun Halloween floral arrangement.
