Mudding Drywall in The Garage Transformation
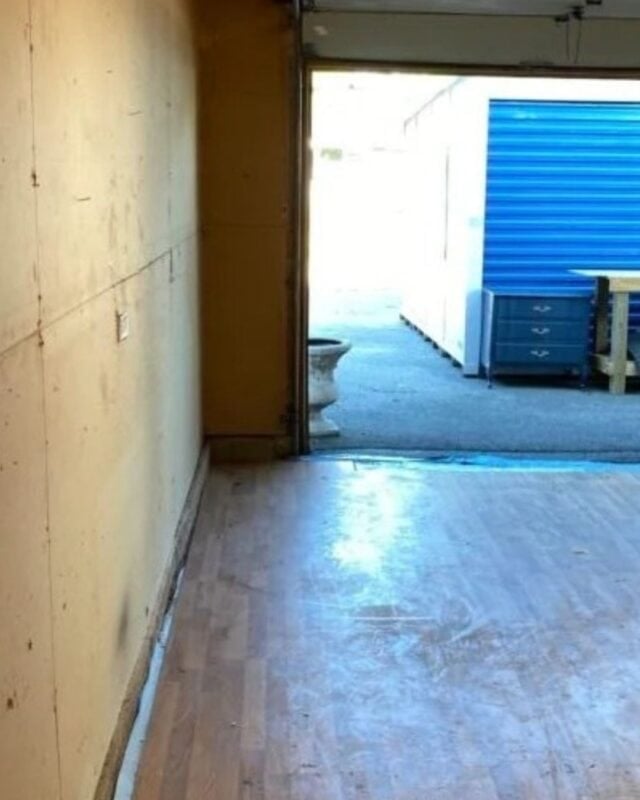
One of the decisions we made when I left the store was to turn our existing one car garage into a working studio space where I could paint and work on projects. It was actually my hubby’s idea (one which I will love him forever for because it’s a huge sacrifice in our small home to take up that much space,especially our main area of storage.). In the past, I had taken up little spaces in our home, but they ended up just not being big enough and somehow I always ended back at the kitchen table. I had been looking into renting a small space somewhere in our town, but once he said that, it just seemed better to have me at home. Now with everything going on, I am so glad we made the decision. The first step was mudding and taping the drywall in the garage. At one point it was a carport and previous owners enclosed it in. Luckily, we didn’t have to do any major drywall installation as it had been drywalled and had electric/lighting and was insulated long before we bought the house, but it was never pretty inside. It just had old, ugly yellow colored dry wall that looked dirty. We decided to finally finish it off and mud, tape and paint the garage to make it a more usable space.
After we emptied the huge amount of contents into a storage pod in our driveway, we needed to get the drywallers in to mud and tape. The garage was full and the pod is FULL. I’m going to have to get rid of a lot of stuff.

Luckily, from the previous owners, we already had ceiling lighting and electric in the space, and the walls were already insulated so there wasn’t much DIY on our half. Those were huge bonuses because it saved us a lot of money. We have laminate in the garage floor because it’s never been big enough to pull a car in and open both doors, so it’s always been storage for us. The really, really old yellow drywall from probably the 1980’s or earlier and made it so dark in there and the walls were a mess. We had areas we had to replace the drywall because things had leaked behind cabinets, or there were holes from things that had knocked into the walls. Luckily, that was just a few small sheets of drywall patching a simple cut out and replace that we could handle before the guys got there. While are DIYer’s and we can mud and tape ourselves, it was such a huge space we decided it was better for us to have professionals tackle the task and make it look smooth and we didn’t want cracking. And we are glad they did it because they were fast, did such a great job, and it was really, really messy. Though I will say that this almost looks like a really cool abstract painting.
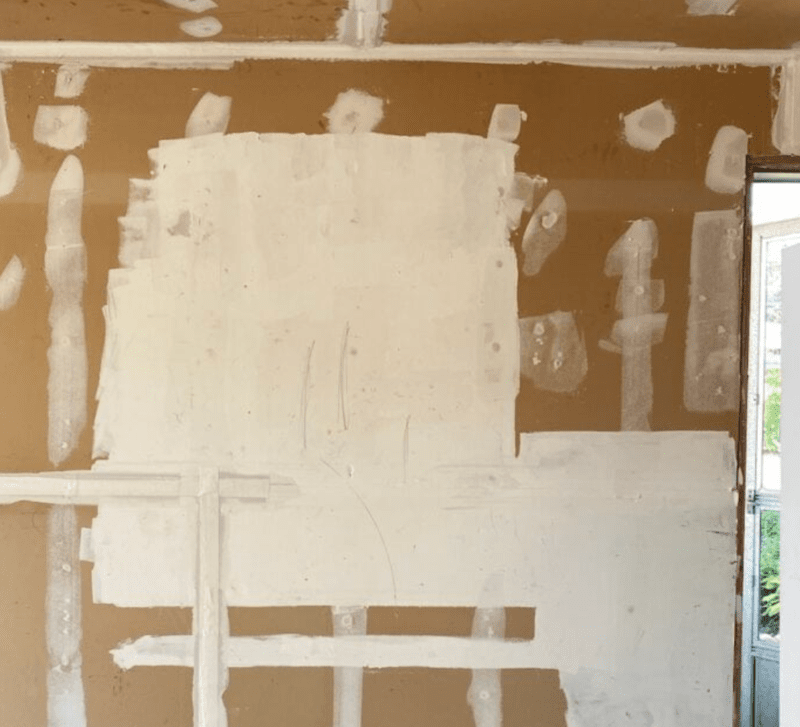
After they went over the drywall seams with tape and mud, they then applied a skim coat. Once the skim coat was done, they applied the primer and that’s where the magic started to take place. It was really amazing to see it transformed, and how much a coat of primer and then white paint makes a difference!

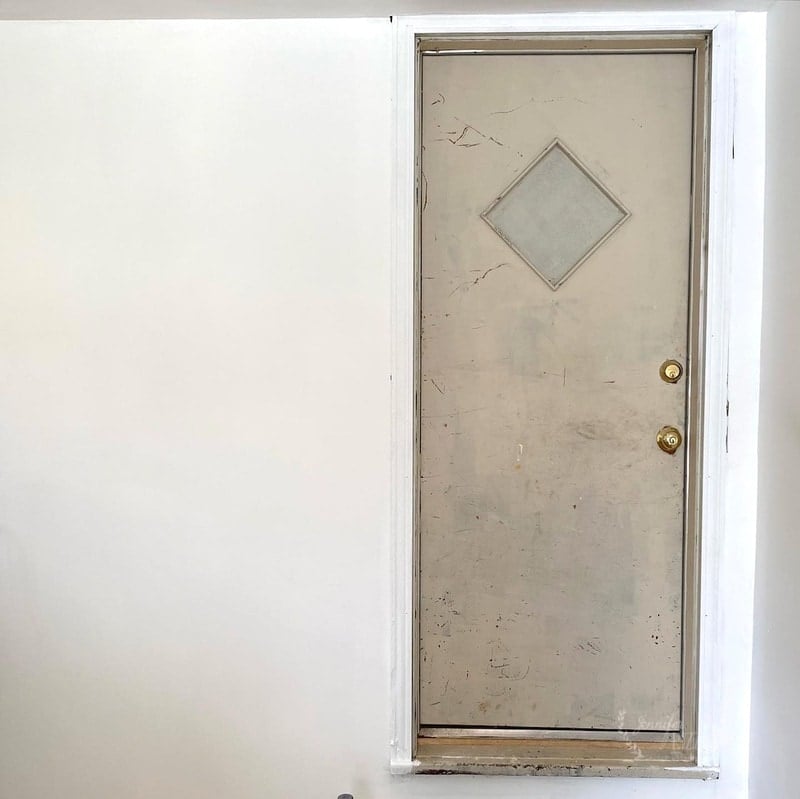
I’ll be painting that old door in the picture. It’s funny how it looked so white next to the old drywall, and now that it’s so clean and fresh looks really gross and dingy. We never noticed on our going in and out to grab something from the extra fridge. Now I notice it!
Our next step will be to hopefully get a new insulated garage door with windows before the temps drop and the snow flies!

So excited for you! My husband can do anything, fix anything, build anything – and does – but the ONE thing he will always do is hire out the tape/bedding/drywall. They are masters at what they do, saving time and headaches, and protect the work we’ve done which ensures our final project looks its best – making the investment so worth it!
Also – paint that door a color that makes you happy every time you walk through it 😉
I’ve been wanting to add an old-time, full-view screened door to our garage bc I LOVE having a breeze and natural light. That might be fun for you too (?) just to be able to feel open and part of the house (only when you want of course).
Enjoy!
I love that idea Missy! Thank you so much! I would love to have the breeze and the outside come in! We are so glad we had them do it. It looks great and they were so fast!