Step by Step How to Paint a Bird’s Nest in Acrylic Paint
Hi everyone! I know you have been asking for another no art skills required painting tutorial, so I thought how to paint a bird’s nest would be perfect for spring! I did this one on a branch for the tutorial, you could just do one giant nest on a canvas with the same technique. This bird nest painting is so cute to add to your spring decor. It can be painted on any size canvas, so you can make a few cute little ones, or a large mantelpiece.

Supplies tompaint a bird nest
Canvas, Acrylic Paint in brown or burnt umber, grey, blue, green, white, light blue, and cream ,Paint Brushes and I also used a round brush and a flat brush. You can also grab a few twigs in the yard, so a faux nest from the craft store for reference.
Check out this post to learn how to paint a forsythia branch.
 After base coating your canvas in light blue at the bottom and a white at the top (blend together to create a ombre effect), use a flat brush or liner brush with brown paint to paint a branch shape. If you pull the brush from right to left pushing down hard at the start and lifting up near the end, it will look more natural. Branches always taper near the ends. To add depth to the branches use a darker brown paint on the bottom of the branch.
 Ad some little side branches, making sure they always get skinnier as they move away from the trunk of the branch. Once the branches are painted in burnt umber, add some early spring green leaves.
 Use a round brush a to draw leaves. Paint the outsides first with a reverse tear drop shape, and then fill in the middle. Adding a deeper shade of green at the bottom of the leaf and some white paint with short strokes helps it to look a little more realistic.
 Make a smaller tear drop for another leaf at the end of the branches. Once that’s dry, you’re ready to paint the nest!
 In the crook of the branch is the perfect place to paint a little, delicate nest. Start by painting a banana shape in brown paint, or a half oval. This will create the base for the nest shape.
 Then paint another banana on top of that in a grey or beige paint. At this point this is your guideline for your next layers of your nest materials.
 Dip your round brush in brown and grey and make cross-hatches across the banana.Use this painting technique following the curves. It will add texture as we layer the short strokes.
 Once you have all of your cross-hatches, let it dry a bit, then add more layers, alternating light and dark colors. Stop before you get to the top of the nest because we want to add a few, cute eggs first.
 Paint one egg, then add a few more. These remind me of cute, little trio of Robin’s blue eggs.
 Making them overlapping will give the illusion that they are clustered in the straw of the wild bird’s nest together.
 Paint white paint and add out lines around the top of the eggs to define them and add a highlight.
 Take some more white and fill in the back of the eggshell to shade them a little lighter at the backside on your artwork to add a touch of highlights.
 Once your eggs are shaded,go back with dark brown and start making more cross hatches covering over the base of the eggs, making them seem like they are sitting inside of the nest.
 Then go over the top of that with a bit of cream paint. By alternating the dark and light paint, it will seem like the nest has layers of different materials put together, just like real bird’s nests do.
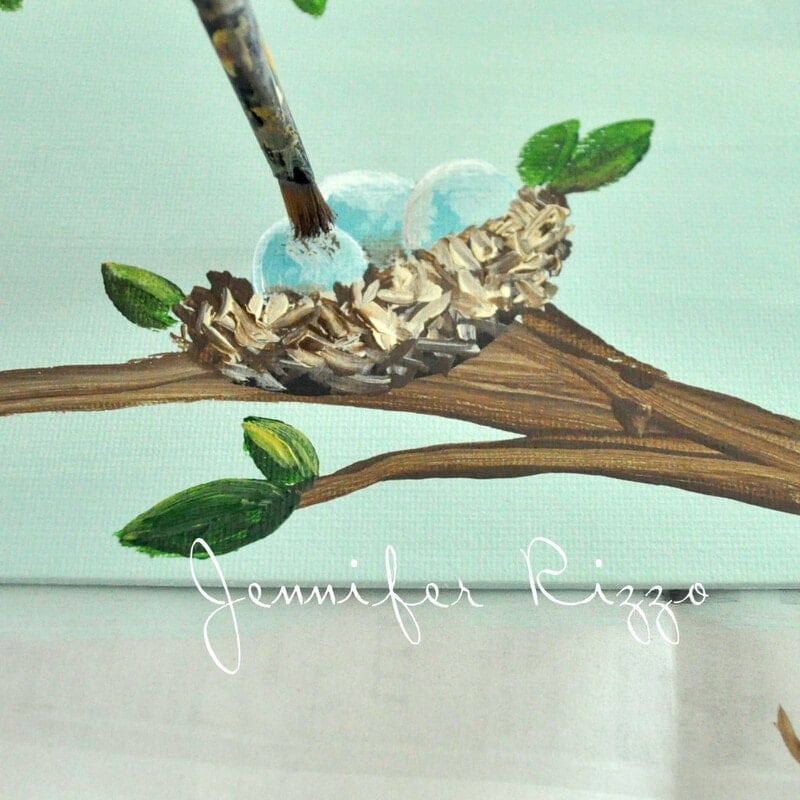 With a little bit of brown paint, lightly dab speckles on the tops of the eggs. Robin’s eggs are always a little speckled. If you feel you’ve added too much brown, you can go back and dab more speckled white on top.

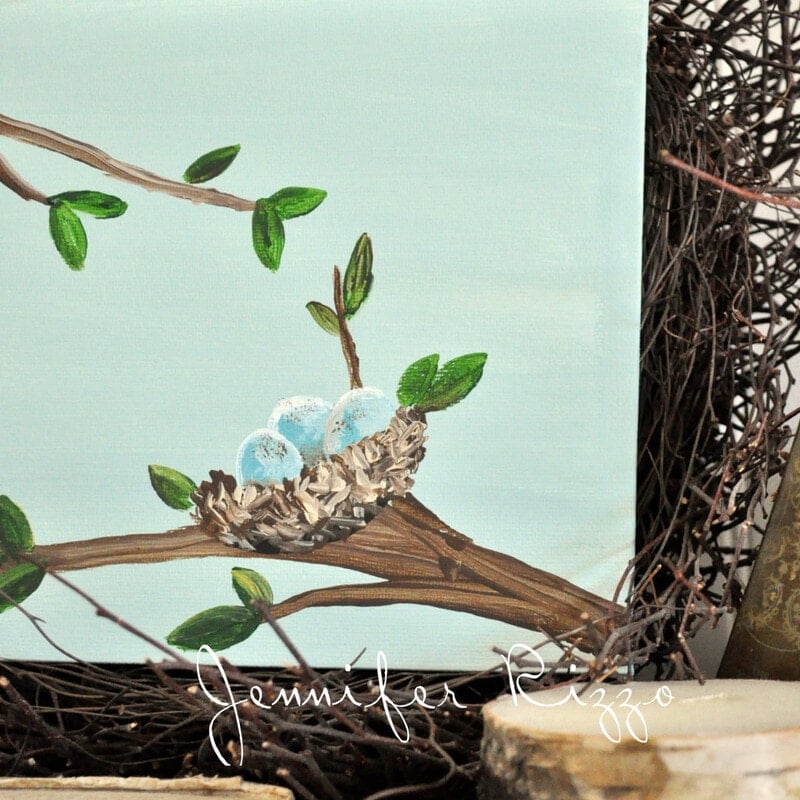
And then let dry! You can go back and darken your tree limb, or add more leaves and branches like I did for my painted bird nest.
Once you have your whole pictures painted and it’s dry you can seal it with a acrylic sealer.

It brings a nice touch of Spring to your decor with a pale ombre backdrop behind the painted nest. I nestled it inside of a large faux nest which I think makes a cute display surrounded by a fun cast iron bird and book stack.

Have fun with this how to paint a nest tutorial for spring!

If you liked this post, you also might like:


Luv your painting blogs. Do more more more! Please.
XO Joanne
Wow, you’re so talented Jen! I’d love to try some of your tutorials with painting. You make it look so easy!
Hugs,
Jamie
You are a great teacher…..making it look so easy! And cute! Thanks.
You certainly make me think I could do this, but in reality there is NO artistic talent here – love your work!!
Thank you!
I love this painting! The white pumpkin painting I did from your fall tutorial was fantastic. (It was my first attempt to paint on canvas.) Better get my next canvas ready for the spring project! I might try an even LARGER canvas this time. It would be great for the mantel with my bird collection & framed prints. Thanks for the inspiration…
Victoria
I have now done your pumpkin tutorial and the egg nest tutorial and I so appreciate your instructions. For someone who has never painted before it is so great to feel like I can really accomplish something! Thank you so so much! I have one question I’d love some input on. I love how the nest painting turned out but now that it’s all done I’m wishing I would have done something to make it look aged. Is there anything I can do after the fact to give it a bit of an aged, distressed look? I’d love some input. Thank you!
Brooke
You can go over with with either brown paste wax or a mixture of 50% brown paint and water and give it a wash.
Thank you so much! I will give it a try. Keep the tutorials coming!