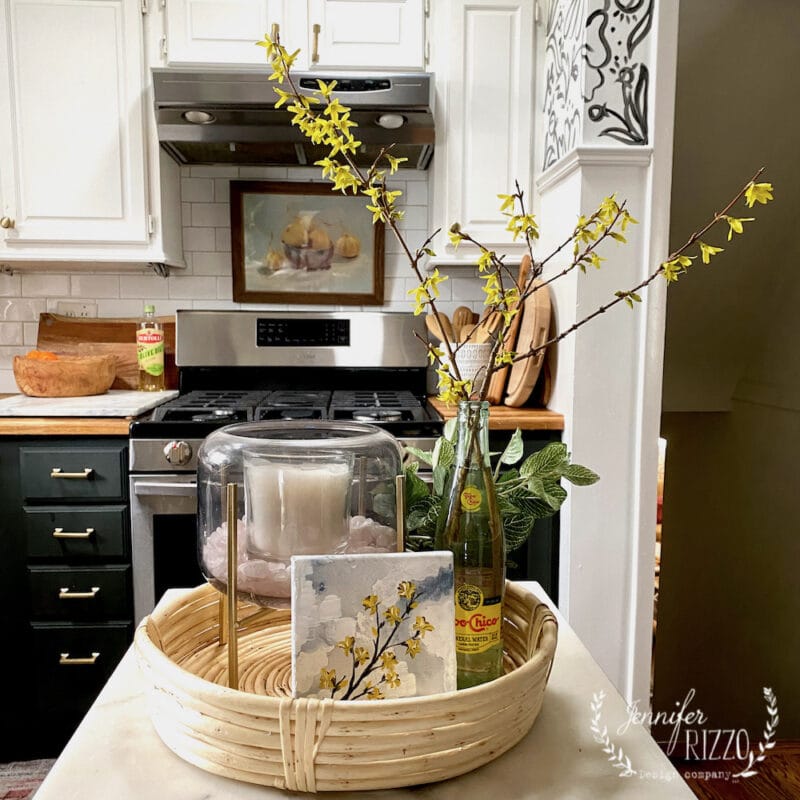
How to Paint a Forsythia Branch in Acrylic Paint
Forsythia is one of those flowers that I really underappreciated for a very long time. For years I’ve viewed them is merely a landscape plant that people pop in to get a little spring color before everything else comes up. I really thought they were a little bit unassuming. This year for some odd reason they really caught my attention, and I’ve even worked on forcing blooming a few branches in my house with great success; they are so easy to force bloom! Now after the long winter, especially this year, I really appreciate the hope that they bring with their blooming and knowing that this winter is almost over and we are past some of the worst times. I wanted to share with you a paint tutorial of how to paint a forsythia branch, because it’s much easier than you would think….You only actually need one 2 brushes, a little water, and a few colors.There is a video tutorial , or you can skip to the step by step below. If you don’t want to paint your own forsythia still life, you can grab the free printable at the end.
This post contains affiliate links. See our sponsor and affiliate disclosure here.
Supplies for Painting a Forsythia Flower
-Blue gray acrylic paint for your canvas background, (You can use even craft paint for this project.),
– Paint colors in: Titanium White, Burnt Umber, Yellow Ocher and Bright Yellow,and Sap Green. Find paint supplies here
-Water
-Brushes thin round and wide filbert or square brush
-Paper Towels
You can watch a full video of the process, or skip below to the picture DIY of painting a forsythia flower branch. If you need a reference, there is an up-close picture of a forsythia branch at the end.

Paint the Canvas with Paint and Water
To create watery background finish by floating your acrylic paint in a water base. Simply dab your canvas with a bunch of water with a large brush, and then take a little bit of the blue gray paint and dab on top.

The paint will melt into the water, and create a flowy-looking pattern. You can even use your brush to move around a little bit to accent the pattern. If you want to make it look drippy while there still water, tip the canvas up so it runs down to a paper towel on the end, this will give a water running affect. Let your canvas dry. This could take up to an hour or you can use a blow dryer on it on the low setting. Did you know you can paint abstract art with a blow dryer?

Paint the Forsythia Branch with Under Painting
To paint the forsythia branch start by using the burnt umber and a skinny brush, and draw a squiggly line. Use the tip of the brush to make it thinner near the top of the branch and thicker near the base like a branch will naturally grow. After that, add some little side branches using burnt umber.

Create some little flower petals by making a little swoops with your brush of the burnt umber. The yellow ochre will go over the burnt umber.

Add Yellow to Paint the Flowers
Use your tip of your brush to start the tip of the pedal and then work in quickly to create a very loose petal pattern. You can also use this to create little buds along the way by dabbing your thin brush with yellow ochre paint briefly to the canvas.

Accent the Flowers with Bright Yellow
Paint the bright yellow over the yellow ochre. This will brighten up the petals and it actually looks better if it’s not perfectly over the top of the previous strokes. It’s ok to do this slightly wet so the colors blend a little. Make sure not to overwork the paint to become muddy.

Accent the Forsythia Flowers
Use titanium white to accent the flower petals on the ends to create a highlight. A little sap green can be added where it touches the branch if desired for a green accent.

That’s it! That’s how easy it is to create the look of forsythia flowers on a canvas. They’re so easy to paint and they’re so cheerful. If you feel like they are still a little bit dark, go over your old strokes with bright yellow paint and white and it will brighten it up instantly!

This is such a fun way to also bring forsythia blooms in your house if you don’t happen to have any branches that you can clip from nearby!

If you liked this tutorial, make sure to save it to Pinterest! You can also see how to paint a bird nest, and making inexpensive botanical art prints


I absolutely love this picture. Thank you for sharing.