Beadboard Wallpaper in our Dining Area
I was so excited to put up my beadboard wallpaper back in 2009, that it didn’t matter to me that it was not pre-pasted or that it came with no directions…and never mind that I hadn’t hung wall paper in over 10 years… It was so new and fresh at the time. It seemed mind blowing. Did you know they make beadboard wallpaper? It’s such a great way to add that cottage-feeling without committing to expensive paneling or wood. This is a look at the OG project.
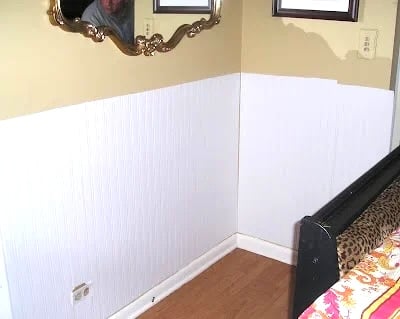
Something I did learn is that wallpaper and “winging it” does not really go well together. I also love that the directions on the can of wallpaper paste were “Follow the instructions as directed on the wallpaper package.” So, what the heck, I “wung” it.
I slapped that paste on, did not “book” my paper and ended up glueing the edges of my paper together with wallpaper paste and a paint brush. I prayed that when I got up in the morning, it hadn’t all rolled off of the wall onto the floor. I know the whole thing was very “I love Lucy.” Luckily, in that time since, wallpaper has become much easier to hang with peel and stick and removable!

Once I added the piece of trim, the uneveness at the top didn’t matter quite as much.

I got lucky and the beadboard wallpaper stayed up and I was even able to hide my uneven measuring with the trim molding. Thank goodness paint also hides a multitude of sins, so it didn’t matter that the men who built my house in 1959 obviously couldn’t draw a straight line as all of my walls are “wonky”.

I love the result. It was great money spent for the impact. I would say it was less than $40 with the molding, and I still have a ton of paper and paste left over…it’s a very simple project..after you read the directions. It’s made it the nicest little nook area that’s become so versatile even as I have changed my other decor and wall color.


p.s. I was asked about my faux paneled door project . I used standard 1- 1/4 inch trim.
If you are reading this post at any other sites or blogs besides Jenniferrizzo.com, your rss feed,e-mail or in your reader this is stolen content.
*This was posted Via Jennifer Rizzo. com
Hello Jennifer, It is nice to meet you. Beautiful beadboard work, and your mirror is gorgeous. We did the
same work in our kitchen, and I’m
very happy with the results:)
Hugs & Blessings ~Wendy