Turn a Picture Frame into a Decorative Tray
You can turn a picture frame into a pretty decorative tray. I think it turned out great and it’s easier than it looks! I can’t take credit for this project. I saw something very similar in a decorating magazine somewhere, but they never explained how to do it, so here’s the tutorial to make your own.

You’ll need a few tools, handles, collage elements, paint, plywood, wood glue, and an old wood frame and replacement safety plexiglass. Don’t leave the original glass in. It’s too likely to break.

(especially if you have kids around, my kids break everything.).
Start by removing everything from the frame. Be super careful with the glass and any staples or nails, (Always take proper safety precautions and wear appropriate safety gear.). Put the glass somewhere safe or safely dispose. I put mine next to me and almost broke it about 40 times. Don’t do what I did.
If needed drill holes for handles in the frame. Paint your frame now and let it dry. When your frame is dry, polyurethane it for durability and then you can add you handles on. Make sure you screw them in tight. Carefully replace your plexiglas.

Now is a great time to work on your collage (I think this would be really cute with family pictures too.). See more tips here on decoupaging vintage graphics if you want to go in that direction.

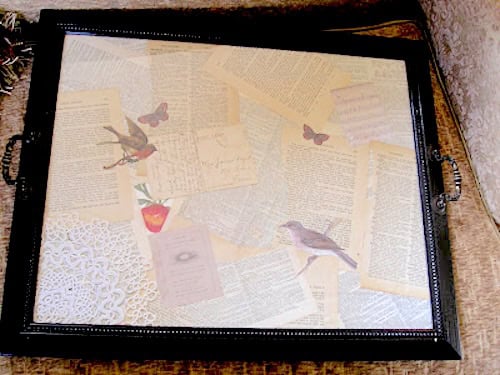
I flipped over the cardboard back of the picture and used double stick tape to adhere my ephemera and images. I used old book and dictionary pages, post cards and images printed off the computer. You can find some really great ones at The Graphics Fairy.

Place your collaged picture inside, making sure the plexi is dust free before sealing up. When you have everything in, add cardboard until the picture area depth is the same height as the back of the frame. This way when it’s flipped over, the glass won’t slip backwards.
I went to Home Depot and the very nice gentleman there cut an 1/8 piece plywood to fit the back. Have it cut an 1/8 inch less than you need all the way around to make sure you don’t overlap the outside edges.
You’ll put glue around the edges where the back of the frame meets the board, then you’ll hand screw it in the back. Pick screws that are just long enough to go through both the back of the plywood and the meatiest part if the frame. I put in about 3-4 per side, being careful not to hit the glass at all or go through the front.
Once it’s in, you can paint the back. I put felt on the back of mine and it was ready to go. You could also add a hanger on the back and use it on the wall for custom art.

If you are reading this post at any other sites or blogs besides Jenniferrizzo.com, your rss feed,e-mail or in your reader this is stolen content.
*This was posted Via Jennifer Rizzo. com
Great idea! Its really helpful to have nice piece with not much cost.Thanks for sharing such good stuff.