DIY Air Dry Clay Bird and Feather Wall Hanging
I love working with air dry clay. It’s one of those things I can get my hands into and zone out for hours. I made a DIY clay bird and feather wall hanging out of clay to share with you. This project can be customized to create any kind of wall hanging or even Christmas ornaments no kiln needed! If you’re not so sure on your sculpting skills, don’t be afraid to use cookie cutters! You can use them to make so many clay ideas and creating should be fun and easy! We use Paperclay for this project and it’s a pretty awesome medium. It’s very mold-able and very forgiving, and dries really fast. I love making art dolls with it as well.
This post contains affiliate links, see our affiliate and sponsor disclosure here.
Supplies for Creating this Air Dry Clay Artwork
-Template or cookie cutters (hint: cookie cutters and clay work well for classroom clay crafting too)
-Clay tools
-Wax or parchment paper
-Water
-Acrylic craft paint
-Grommets, twine and a stick
-Sealer such as Triple Thick by Decoart
-White craft glue
Roll Out Air Dry Clay and Trace Templates

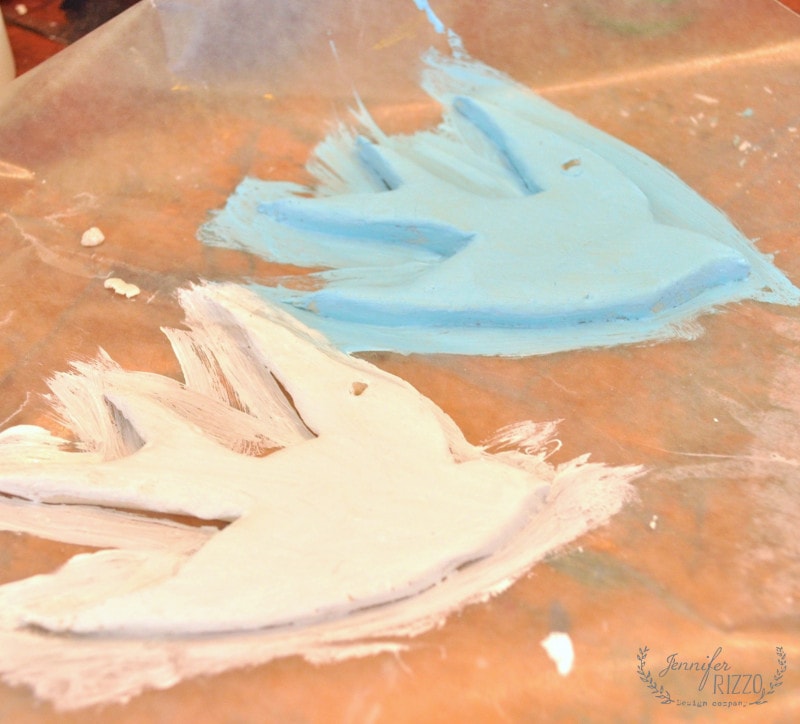
Use a rolling pin or thick dowel to roll the clay out flat onto wax paper or parchment paper. To cut out the birds, I used an image from the Graphics Fairy as a template. I just traced around it, removed the excess clay, and patted down any rough edges on the sculpture. Paperclay takes about a day to dry before it’s ready for paint. I like working on wax paper when I clay play with it because it’s very easy to move it, or remove it off your surface. And it makes the clean up really easy.
Use Water to Smooth the Edges of the Clay
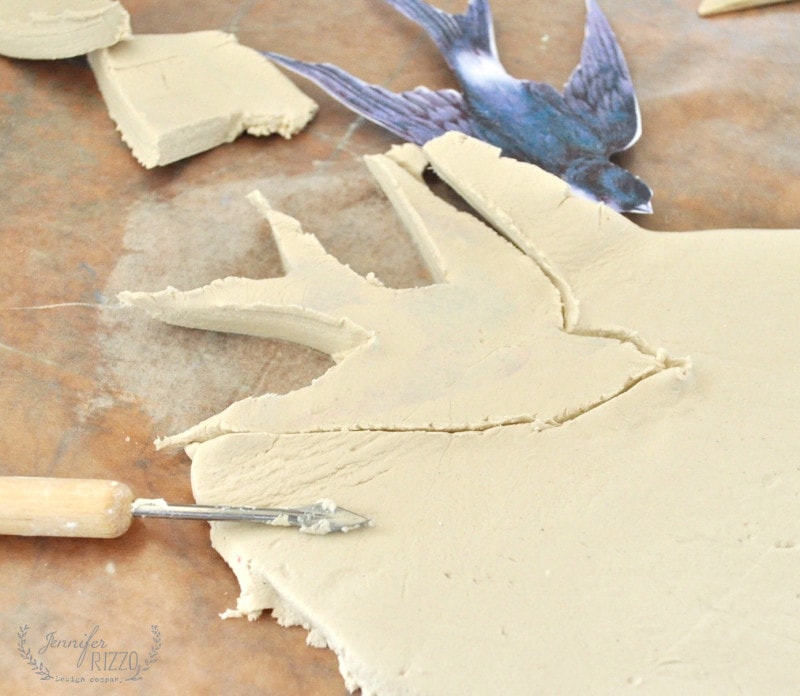
Use a small amount of water on tour fingers to smooth any of the edges. At this time also create a small hole in the top of the bird where you want it to hang and set it aside to dry fully. This may take a few days.
Sculpting Bird Feathers in Airy Dry Clay
Bird feathers can be easy to make our of clay using a few simple steps. To make the feathers, I start by making a “snake” and pressing it flat.
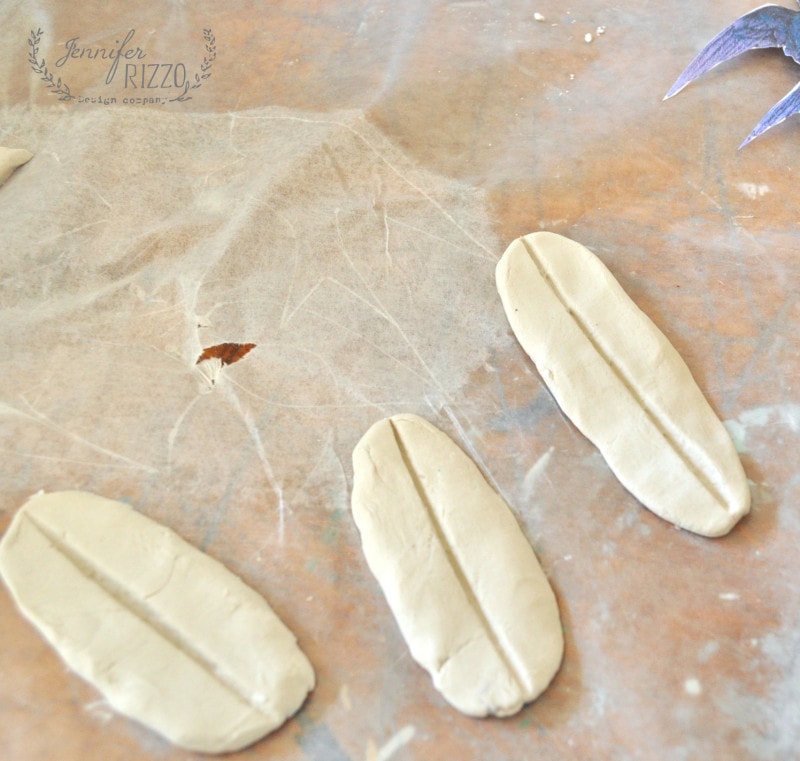
Then I took a clay tool (or use a flat edge of a popsicle stick) and press it into the clay down the center to create the center of the feather.
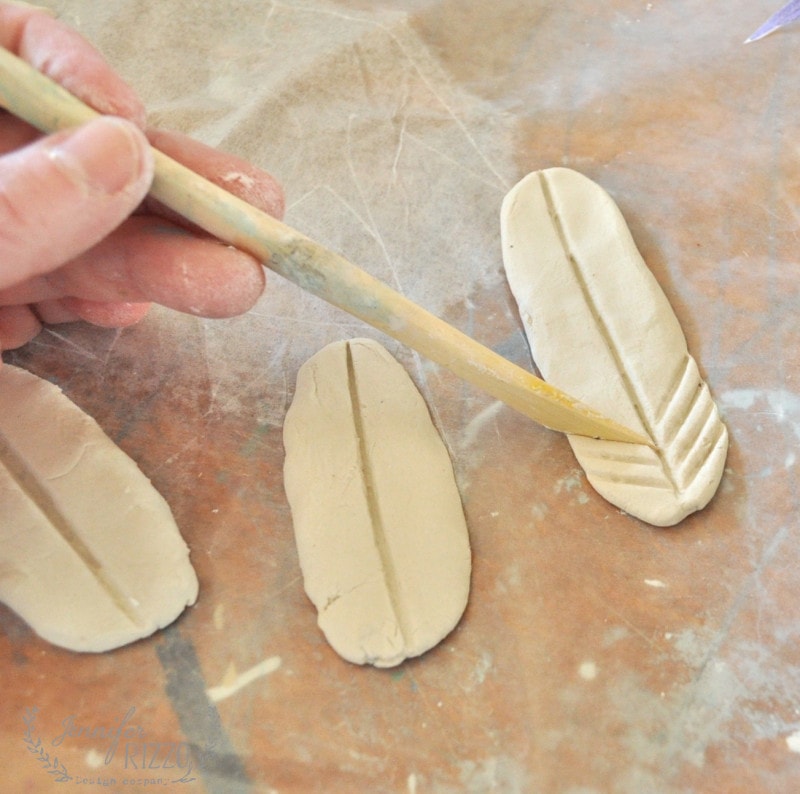
To make the feather sides, use a clay tool or flat wood stick to make angled lines by pressing and angling the edge upward. Smooth the edges of the clay, use a tool to create a hole and let the clay dry 24-48 hours.
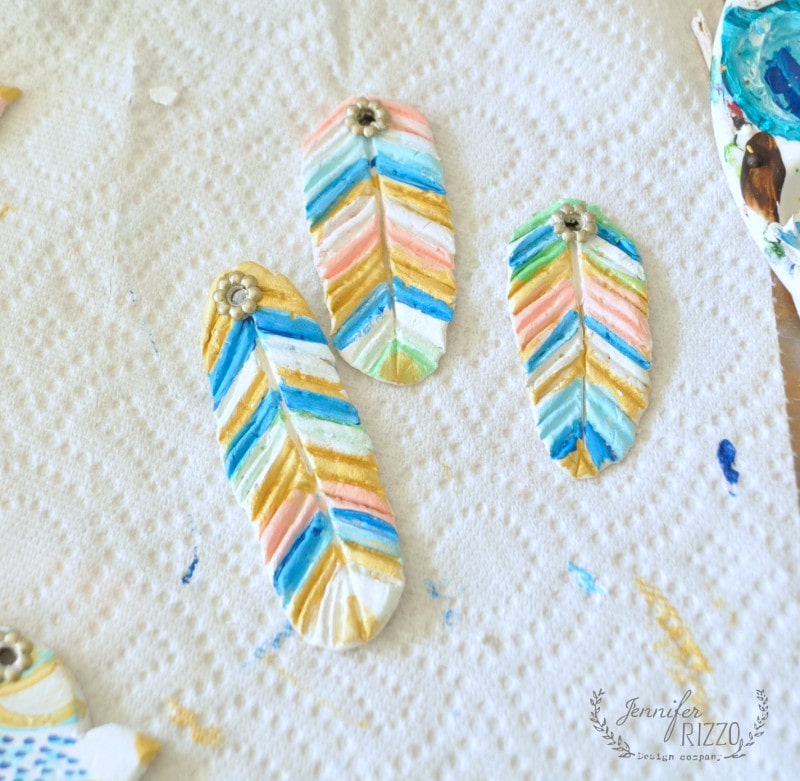
Paint Clay Birds and Feathers with Acrylic Craft Paint
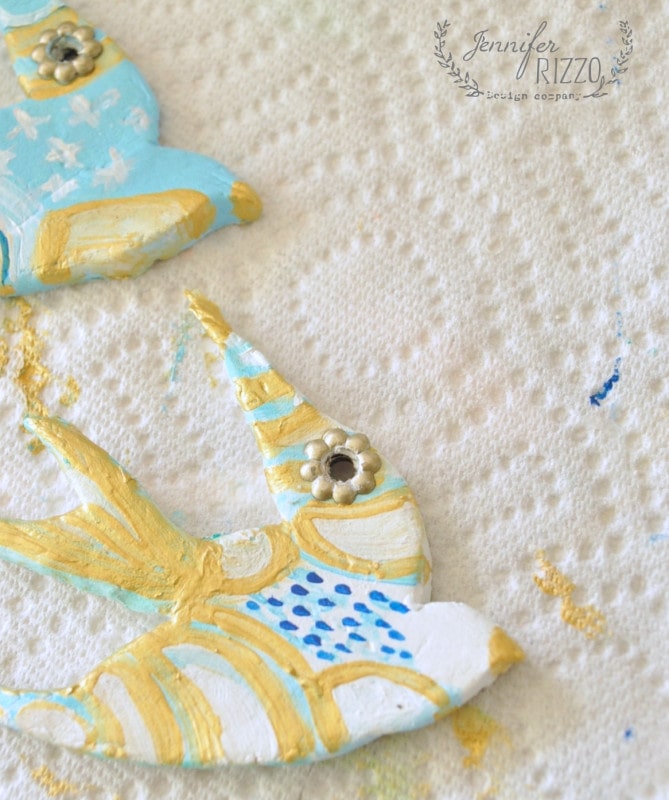
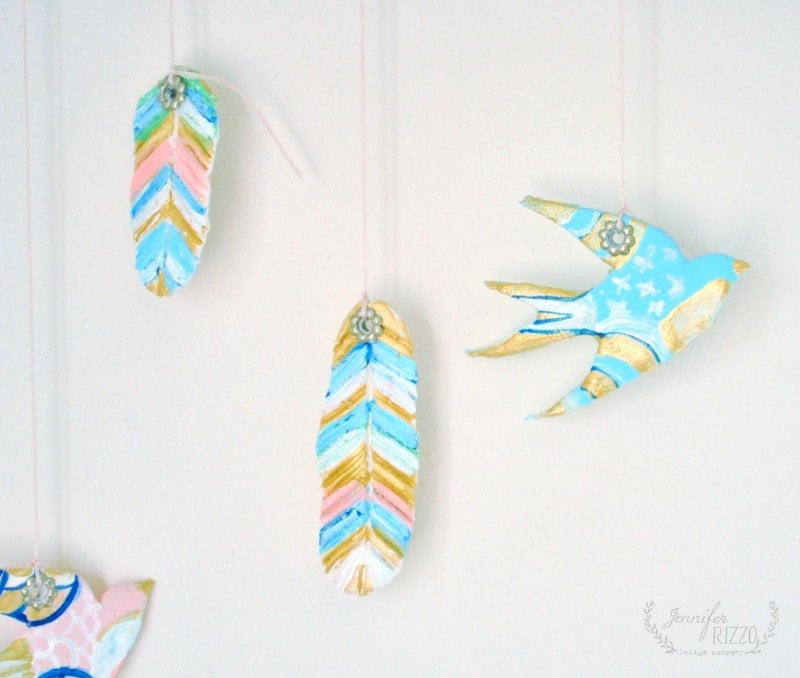
This is the fun part! Once the clay is completely dry, these can be painted in anyway to match your decor! We find adding a base coat color first to seal the clay, letting it dry and then painting the details works best. You can get fancy and decorate them however you like!
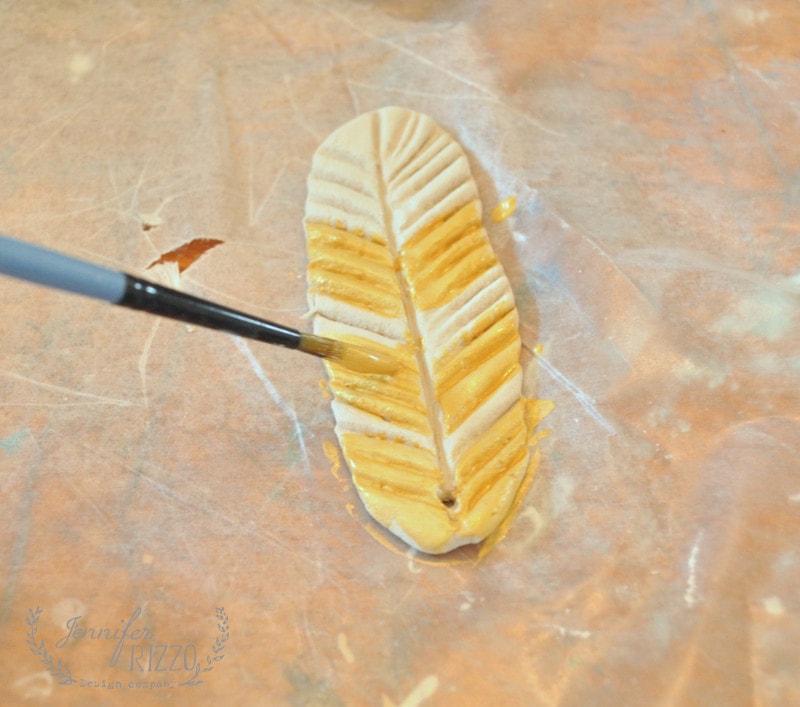
I got a little fancy with the feathers with some gold craft paint. 🙂 Let you creativity run wild when painting. The best thing about acrylic paint is it can always be painted over. When painted, seal with a protective top coat such as a craft varnish, If you would like a more shiny, resin-like finish, use Decoart’s Triple Thick. Let dry.
Add the Grommets
I also added scrapbooking grommets to not only reinforce the hole, but add a fancy detail. When using these grommets, don’t use both sides how you would normally use them. Only use the fancy side and glue it in with white craft glue.
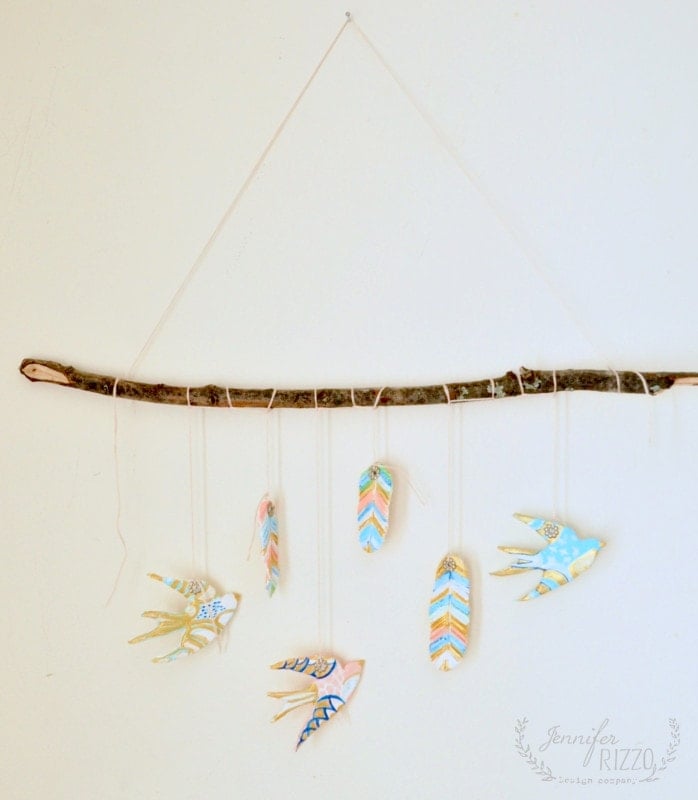
Once everything is dry, you are ready to hang. I used a branch form my yard, and embroidery floss. The floss had a more delicate feel than twine or string, but any of those will work. This is adult art, so make sure to keep this out of reach of small children, pets and heat or flame.
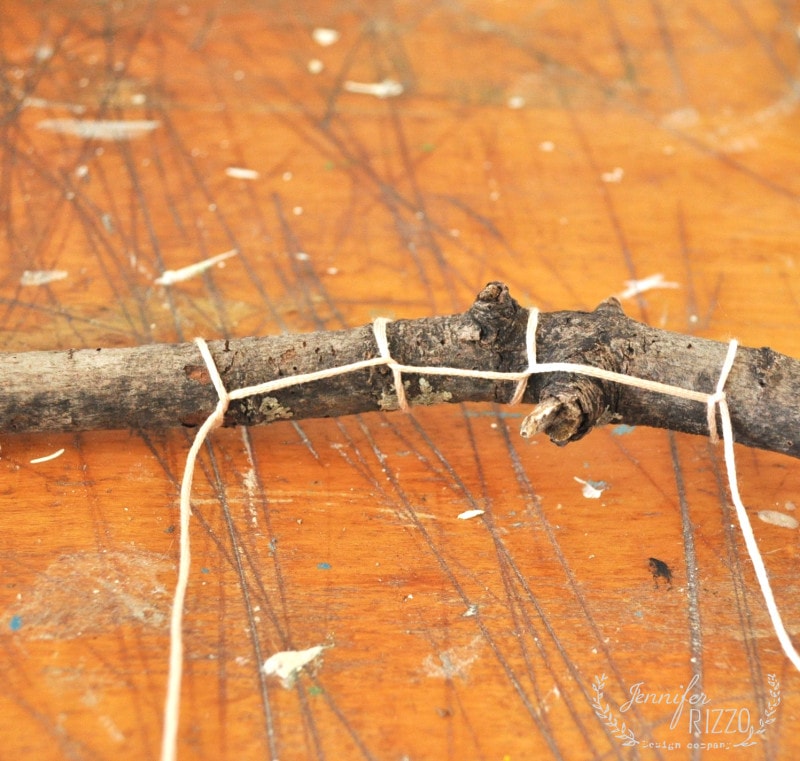
I picked a pale pink color and tied it with a modified blanket stitch to hang it on the branch.
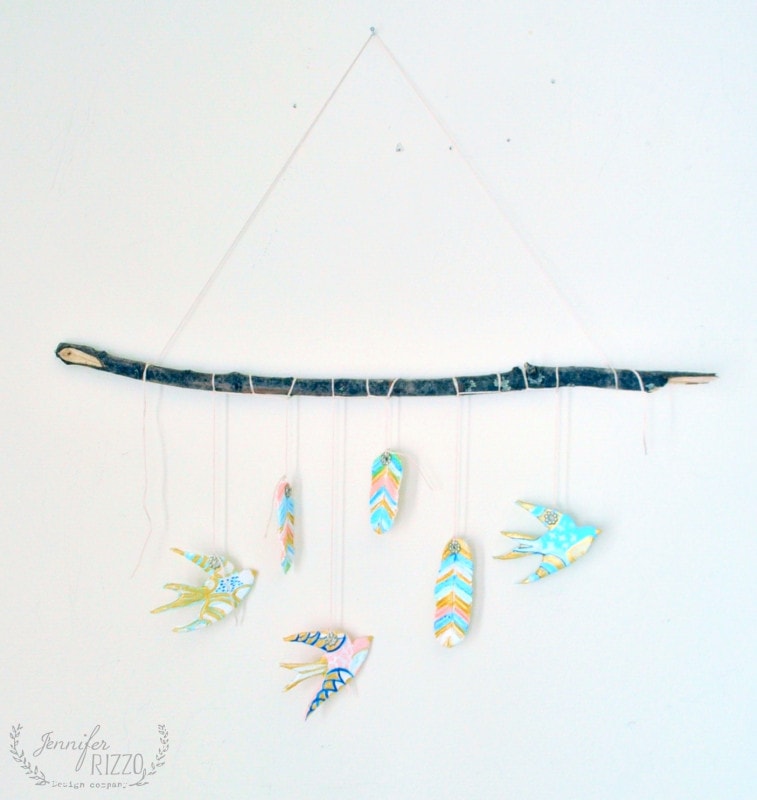
I staggered the heights of the birds and feathers.
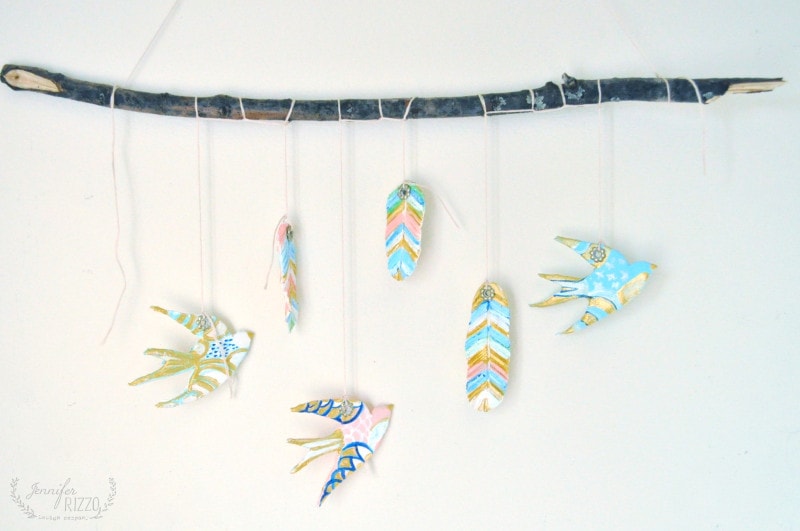
I also painted the birds a bit fancy too. I love all of the color and pattern.

It adds a nice pop of color against a white wall.
If you’ve never worked with Paperclay, it’s something to really get out and dig into. I think it fulfills that whole “playing with mud” thing I used to do as a child. 🙂 I hope you grab some clay and try this DIY clay bird and feather wall hanging! You can find the Graphics fairy bird image here. You can find Paperclay here.
Do you love easy clay ideas? Try also:
Making this strawberry trinket dish
Dried Flower Air Dry Clay Ghosts
Sculpting a Santos Doll in Clay
