DIY Diorama Ornaments: Fun with Vintage Style
Dioramas were some of my favorite vintage ornaments as a kid. It’s almost like that little window cut out in the front of the round ball was a magical window to another wintery place. My grandma had several including one with a teeny tiny Rudolph the Red-Nosed Reindeer inside. I wanted to recreate these fun ornaments with a twist and share the tutorial with you. I couldn’t find any ornaments with openings that I liked , so I decided to make DIY diorama ornaments with small lidded boxes from the craft store. I found mine as a six pack in the paper mache craft aisle, and decided to make 3 different styles. It was also fun to shop for the cute minis to use inside. These are such fun holiday decor and make the perfect gift or a fun way to decorate your Christmas trees.

The supplies to make your own DIY diorama Christmas ornaments include:
Paper Mache round craft boxes, craft paint colors of choice, glitter, white craft glue, hot glue gun, fake snow, embroidery thread, ribbon or twine and miniature figurines or accessories such a little deer, snowmen, bottle brush trees, and embellishments like cotton balls for snow.

You can find miniatures to make your dioramas with in the craft store in the Christmas aisle, dollhouse section, and even the area where they have fairy garden items.
Separate the lid of your box from the base and set the lid aside for another project; you’ll only need the base for this project. Using a safety pin or something similar, carefully poke two holes in the side close together. This will be where you hang it from later.

Paint the outside and inside of the round box base. I chose to make mine two separate colors for a more vintage look. Once the paint is dry, add white craft paint to the inside of the box and spread it with a paint brush until it’s even. Immediately sprinkle glitter over it until it coats the inside and then pour out the excess and let dry.

Add glitter or paper inside of your vintage style diorama ornaments
When using glitter, you can use a little glitter or lot. I personally like it really sparkly, it makes it feel even more vintage. You don’t have to glitter the entire ornament either, you can also use wrapping paper, vintage paper, old Christmas cards or vintage sheet music to cover the inside of the back. Just cut a circle to size and glue in to make these feel like vintage Christmas ornaments.

Once the glitter is dry on your homemade Christmas diorama ornaments, you are ready to glue your miniatures inside. Position the miniatures inside and glue down. Hot glue tends to work the best, but it just depends on the miniatures that are being used, white craft glue can be used.
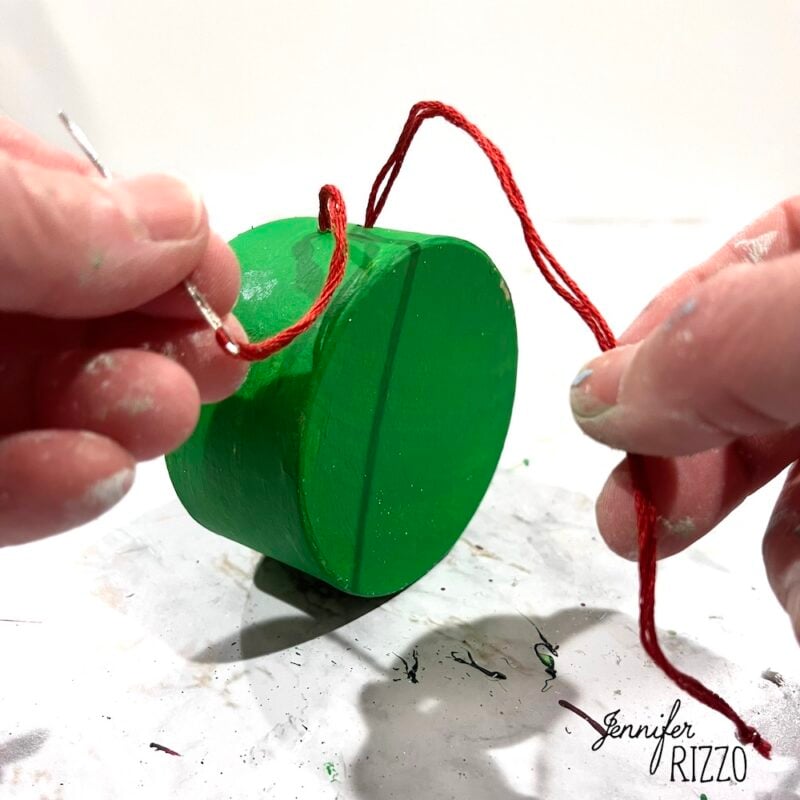
At this time, thread either embroidery floss or twine through the holes at the top of the ornaments, tie a knot and create a loop to hang the ornament. It make sit easier to do that now instead of after everything is glued into place.

For my handmade ornaments, I made one that was a little more traditional with a miniature deer that I glued inside if the ornament with a drop of glue on the bottom of each hoof, but I also had fun making one with a dragon and mushrooms. For the mushroom one, I kept it a little more classic and painted the inside of the ornament white with white paint.

To finish off the edges of the diorama, run a little glue bead around the edge and add either thin metallic garland ribbon, or a pipe cleaner. Embellishments such as snow can also be added at this time as well.
Adding in snow and mini bottle brush trees inside of your ornament also creates a cute scene. There is something about handmade Christmas decor that really makes the season!

It was so much fun to make these DIY Christmas ornaments! It really brought back all of the memories from my childhood, and I love that I can put a modern twist on it!
