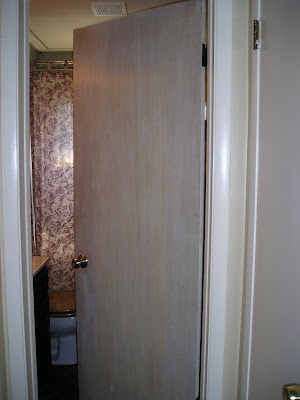
Making a faux paneled door…It’s not faux bad.
On Saturday, my wonderful hubby took all the kids out for the day so I could have a free day to myself… do you think with all of that time I sat on the couch with bon-bon’s and a trashy romance novel? Oh no.. I finally decided to tackled a project that I had been dying to do for ages… a faux panel door.
For 8 year, I looked at this ugly door, not sure what to do with it… I finally decided a paneled door would be nice. Plus I had nightmares of this mirror falling off and reducing our income tax deductions by one…
After removing the mirror and filling the holes, I marked out where my panels would go.
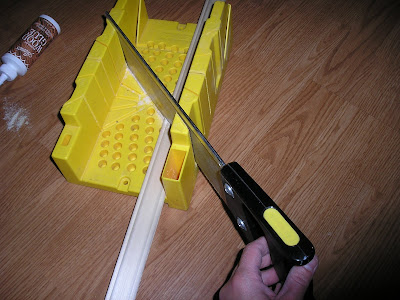
I then cut my molding. I would recommend if you only have a regular miter box like I do, go with pine molding. Oak is impossible to cut and I would be lying if I didn’t tell you after cutting these 8 pieces, my arms was tired and I was sweating… I am so out of shape.  After you measure and cut you pieces lay them out. I found the trick to cutting the right length is to make sure that I am measuring from longest part of my 45 degree angle.
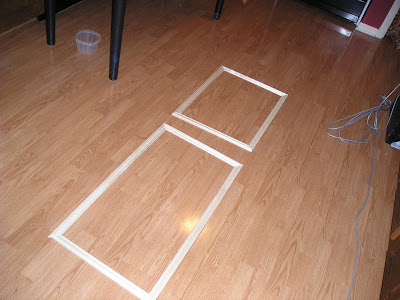
Lay them out on the floor to make sure you have the right size pieces. I only mis-cut one piece. Using a molding that had a certain direction to it made it a little harder to. I actually had to back cut one side all of the time to make sure I had the right direction and angle.
I then.. glued them to the door with a mixture of wood glue and..um… yes, hot glue. I am sure it’s not a carpenter’s dream; but it’s a hollow door so I didn’t think nails would really help. And I’ll tell you, that hot glue sticks fast and I couldn’t pull it off, so I don’t think it’s going any where.
I used a level to make sure they were on right as I put them on. After putting them on, I also put a wood embellishment at the top.
And then I wood puttied any spot I had a huge gap like here (Let it dry and sand it smooth.).
Once it was up, I let it dry for a day so the wood glue could cure.
And then I painted!~
For fun, I added an antique brass door tag I got in Kentucky.. It says “law offices”. I thought that would be kind of funny for a bathroom. I wish I had found one that said “library.”
The project including trim and paint cost under $30.00 if you have none of the supplies(Not including a miter box, but they aren’t that much). I already had the paint and wood filler so all I needed was the trim.
To figure out how much trim you need, pre-measure your panels. My panels were 37 x 17 1/2 and 23 x 17 1/2 and it took about 3 hours to measure, cut the trim and glue.
I think I am going to age to door a little to make the molding pop a little. But it wasn’t as hard as I thought it would be. I would just recommend buying a little extra molding for mistakes and not doing it in the middle of your kitchen floor like I did. It makes a little bit of a saw dust mess . 😉
For every one asking about my dining room make-over, it’s coming; I’m just waiting on fabric.
~Jen
If you are reading this post at any other sites or blogs besides Jenniferrizzo.com, your rss feed,e-mail or in your reader this is stolen content.
*This was posted Via Jennifer Rizzo. com

Duh….to myself I’m saying duh, why didn’t I think of that before! I have one very ugly door right smack dab in the middle of our foyer. It’s the entry to the garage. Yes, it sounds strange and it’s probably very hard to picture. Anyways, enough about my door…Yours is beautiful! I adore all your wood embellishments also
Wishing a blessed week
Hello! I went digging on Pinterest for some ideas on updating my boring hollow-core doors, I was so pleased to find the answer on your blog! Love your site, and I can’t wait for your CMB 2.0 class (none of which has anything to do with my door issues:). I saw you posted this in 2008 – how has the hot glue held up?