DIY Ponytail Roving Yarn Wall Hanging
Can you be in love with a wall hanging? I think so! I am completely enamored with this DIY ponytail wool roving yarn hanging. I love everything about it from the organic texture of the yarn to the glimmer of the copper. I’ve seen similar yarn wall hangings for over $1,000. This one cost less than $20.

This post contains affiliate links. See or sponsor and affiliate disclosure here.
Roving yarn is wool yarn that is processed before it is spun into the yarn we know for knitting and crocheting. It comes in many colors and has a beautiful, organic quality, and works well for interesting yarn wall hangings and other fiber crafts.
This was also such an easy project to create too! It took me longer to go to the store to buy the supplies. There is a DIY video with the steps included in this post, or you can continue to the steps below.
To make this roving yarn wall art piece, you’ll need a stick or wood dowel rod (I used a birch branch from my yard because we had just trimmed trees for branch pick up), wool roving yarn in your color choice, 1/2 copper plumbing couplings.

Find: The supplies for this wool roving yarn wall hanging
To begin, figure out how far down you would like your yarn to hang and double it over. This is going to loop over the stop of your dowel Rod or stick. Roving yarn easily snags, so lay it cleanly over the stick or dowel without sliding it.

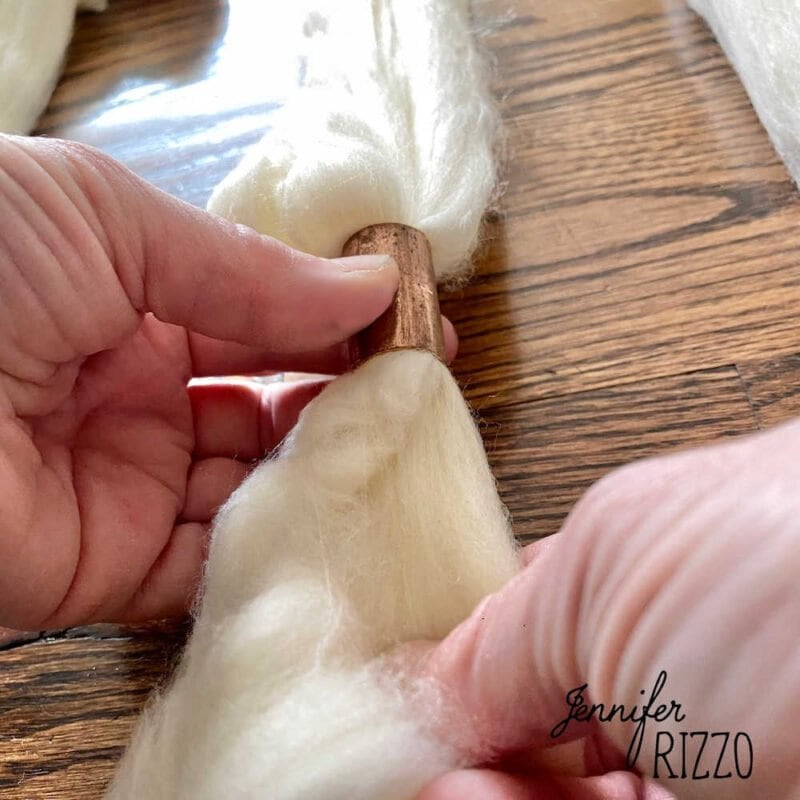
At the bottom of the yarn, push both ends of the yarn through the copper coupling. Using something like a small dowel rod with a blunt end helps to gently guide it through the opening.

Roving yarn made from wool can pull a part easily… treat it with care.
Sliding the coupling up the yarn instead of pulling the yarn through helps to keep it from pulling a part.
Slide the copper all the way up to the base of the stick until it’s snug. Repeat with each yarn piece. One you have them all on the branch, don’t worry if it’s uneven when they are on the floor. You actually want to trim it once it’s hanging to make sure it’s trimmed evenly.

Once it’s on the wall, smooth down the roving yarn. A little bulkiness is ok. That’s what’s so beautiful about it.

Hang your completely roving yarn wall hanging and use scissors to trim the bottoms so they are even all of the way across. I love the contrast that the branch is kind of wonky, and that the bottom are straight across.
Make this: Boho knotted yarn garland

That’s it! It was so easy to create this piece, and the contrast looks amazing against a dark wall!
As always, keep this away from heat or flames and out of reach of small children,. If you want to make some more hands on decor, check out how you can make this paper mache bowl.
