How to Transfer an Image to Wood with a Pencil
Want to add a pretty painted embellishment on a piece of furniture or a wood decor item, but aren’t sure how to transfer it? Here’s a look at how to transfer a repeating image or pattern with a pencil to a wood surface. You don’t need fancy material like a lightbox or a printer, just some tape, a pencil and a light source like a sunny window. This is an easy way to transfer an image for painting or wood burning. I do mostly make my own patterns, stencils and decorations to paint furniture. If you aren’t an artist, you can transfer almost anything you can trace over from a book, wallpaper, fabric, canvas or card works. Black and white clip art with solid lines is the next best thing for beginners. Make sure to use copy-right free clip art. The Graphics Fairy is a great place to start for vintage patterns and images. If you are feeling creative you can even draw your own. But this is one of the many amazing transfer techniques to make art easier! If you aren’t creating a repeating pattern, skip below past that section.
What you need to transfer an image to wood with a pencil
Besides clip art or a design you’ll need:
*Large blank piece of paper
*Regular pencil
*A ball point pen
*Scissors
*Inkjet printer or laser printer copy if you are not drawing your own image
*Watercolor pencil in brown or gray for a light surface and a light color like white or yellow for a dark surface
*Painter’s tape
* A bit of time
How to Create and Transfer a Repeating Pattern
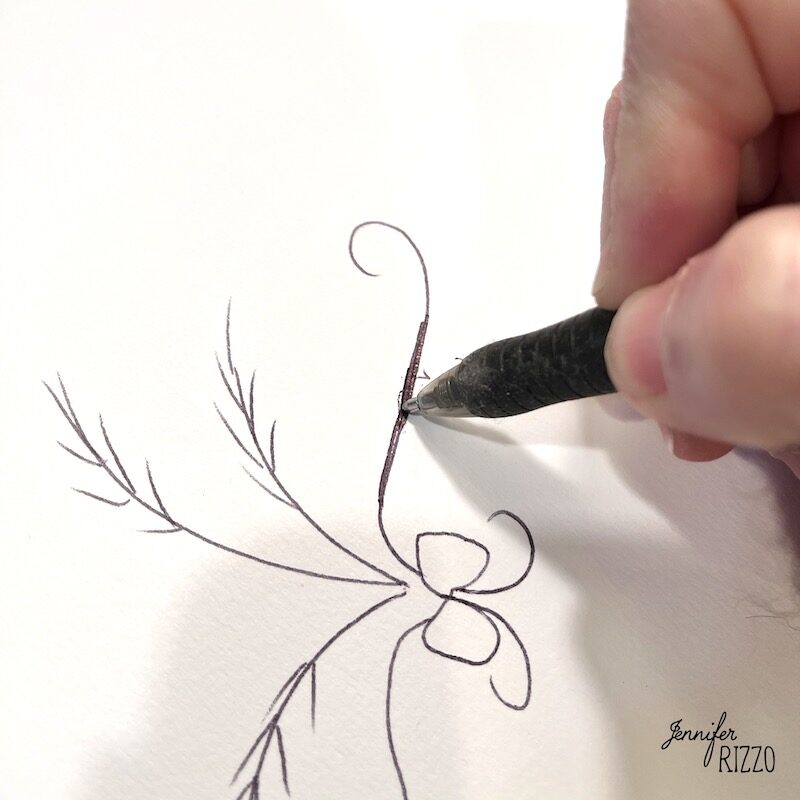
(Skip below if you are transferring a simple pattern) Once you have your clip art or original image ( I am drawing a wheat motif here for an example), set that aside. If you are going to paint your image as a repeating pattern on furniture, you need to first make a template of the surface you are going to be painting your design onto. This will help you lay it out correctly.

Use large sheets of thin drawing paper, like the kind that is super cheap and comes in big rolls that the kids draw on. Tracing paper for a project this size would be really expensive. Take one of your kids old old crayons and do a grave-rubbing style impression of the edge all of the way around. This will help you set up you pattern so you know exactly how it will lay on your furniture. I do this for odd-shaped door fronts and curved surfaces a lot. A square edge is much easier to work with. Cut it out in the exact shape. If your piece of furniture is bigger than the paper, tape sheets together. You are ready to start tracing and repeating your pattern. This is going to be an exact transfer, so you don’t need to mirror image your design. It might help to go over your drawing with a black sharpie if the lines are faint.
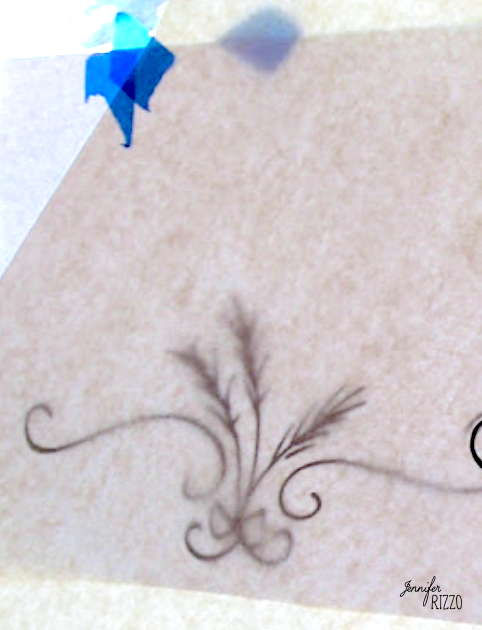
On a large window or sliding door, tape your initial printed pattern printed on a sheet of paper to the door with painter’s tape or piece of masking tape. Then place your paper over the top of the image. The window will act as a light box so you can see your pattern from underneath.
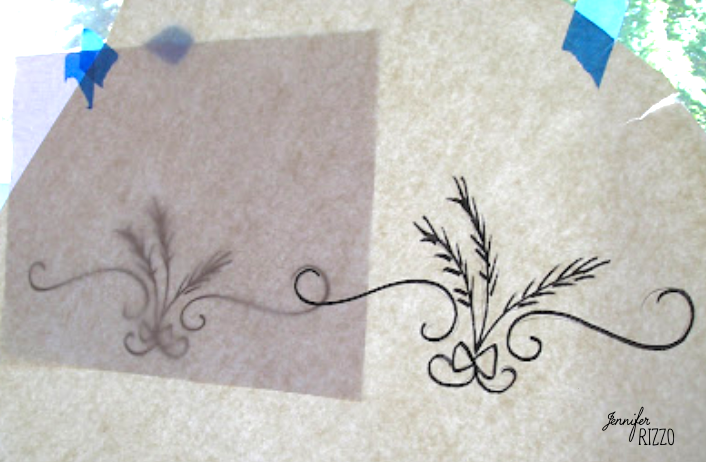
Trace over the top with a ball point pen. Once you trace the entire thing design, reposition your thin paper to how you would like the pattern to repeat and keep going. Moving the paper on the top over the design underneath. Trace that and move it again. You don’t have to do a single repeating pattern either. You can layer your images how ever you like. And don’t just think edges, but edges, middles, doors drawers, sideways, frontways, upside down and backwards :)….. I thought it better to start simply.
How to Prep to Transfer Your Image to Your Wood Surface
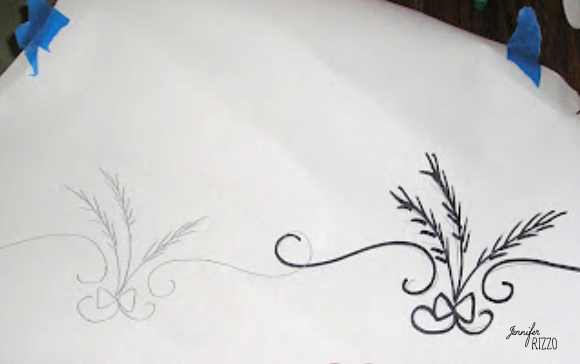
Once your pattern is completely done on your template, step back, look at it, see if there is anything you would like to change or add. Then with a WATERCOLOR pencil (a special pencil watercolor artists use, it pretty much dissolves in water) rub the entire back side of the a pattern with a shade close to your paint color, but bold enough to see. Press hard, you want it to be thick enough on there to transfer to the surface. You can get these pencils an any art supply store for about a dollar. They are amazing and have many uses besides just art. I like to make my nail holes to hang things because they pretty much wash off the walls.

Transfer your Image to the Wood Surface
Once you finish rubbing your pencil over the entire reverse side of the pattern (you may have to re- sharpen several times.), flip it over and tape it securely to your surface. Trace the entire outline of your design with a pen with a roller tip ballpoint pen. Lift a tiny flap in the corner while you are doing it very carefully to make sure you are pressing hard enough and the pencil is transferring through. It doesn’t have to be a heavy line, just dark enough that you can follow it to paint over.
If you need to, go over the entire outline once the entire thing is traced again with your watercolor pencil. Once you lift the paper, you’ll see all of your transferred lines. As a little tip: Pick a color that blends easily into you paint, but for a light surface use a dark watercolor pencil like blue or green and for a dark surface use a light one like yellow or tan.

Then, the hard part is finished (another good stopping point). You are ready to paint, just follow your pencil outline lines to make your final product!

This makes painting large patterns to create your masterpiece so much easier than having to freehand all of your drawing!

If you like this post, you might also like:

If you are reading this post at any other sites or blogs besides Jenniferrizzo.com, your rss feed,e-mail or in your reader this is stolen content.
*This was posted Via Jennifer Rizzo. com
I think the watercolor pencil idea is especially clever! Thank you for posting this! And, I want to tell you that I especially wanted to make sure to comment because I have a couple of how-tos on my blog that get hundreds of hits, and one or two people are all that have ever taken the time to reply. That’s just not right 🙂 . . . especially after all of the effort that you put into sharing this with us . . . so I am here to tell you that I appreciate what you have done. 🙂 Thanks!
~ Debbi