DIY Upcycled Ceramic House Glittery Rainbow Christmas Village
I’m calling it! It’s officially time to start Christmas Crafting! I know Thanksgiving is next, but I love also prepping for the holidays in the mean time! I picked up some super cute, little ceramic houses from the thrift store recently. I thought they would make the cutest Glittery, Rainbow Christmas Village! I’m partnering with Decoart (opinions are entirely my own) to show you how I used their new Glamour Dust Glitter to take these thrift store painted ceramic houses and upcycle them in a fun direction! Rainbow and ombre decor is very trendy right now, especially for holiday decor. Look how cute they are painted! I have an image below showing how they looked before. There is also a paint chart so you know which color combinations I used, and a step by step to get the same look.

(This post contains affiliate links)
In the 1980’s and 90’s, it seemed like a lot of households had these. We had a neighbor that had 30 or 40, and would nestle her entire collection in faux snow under her tree. She also had a cement goose that sat on her front stoop. She would dress up for every holiday, including a bright yellow raincoat for rainy days, but that is an entirely other another story all together.

These houses aren’t actually from the same collection. I picked them up here and there at different visits to the thrift store. Some of them are even meant for a tealight. Since they are now painted, I will probably put a battery operated candle inside, or fairy lights.

After giving them a dusting and cleaning, and removing some candle wax, I started by putting on a layer of craft paint. They aren’t going to get heavy use, so I’m not worried about chipping . Otherwise, I would use a multi-surface paint.

Even though you can paint Glamour Dust Paint on it’s own, it’s really much more intense with a paint color underneath. By mixing and matching paints, you can make some really fun color combinations. I ended up matching my acrylic paint as close as I could to my Glamour Dust paint to get a matte solid finish and cover up the detail on the house underneath. Let your acrylic paint dry completely before applying a layer of Glamour Dust. There’s a chart farther down in the post you can pin and save for later.

It’s kind of fun how painting something with acrylic paint makes it look different, like these trophies I painted a few years ago.
The Glamour Dust is fun because it has a really fine glitter, so you get more of a matte, sparkly finish which is really pretty. It works best when applying thin coats, and letting them dry to build up a more glittery finish.

I ended up with about 2 coats of acrylic paint, and 5 coats of Glamour Dust on each house by the time I was done.

I did use a craft foam brush in the beginning, and then I switched to a regular soft bristled brush. It worked much better to get in the cracks and crevices.

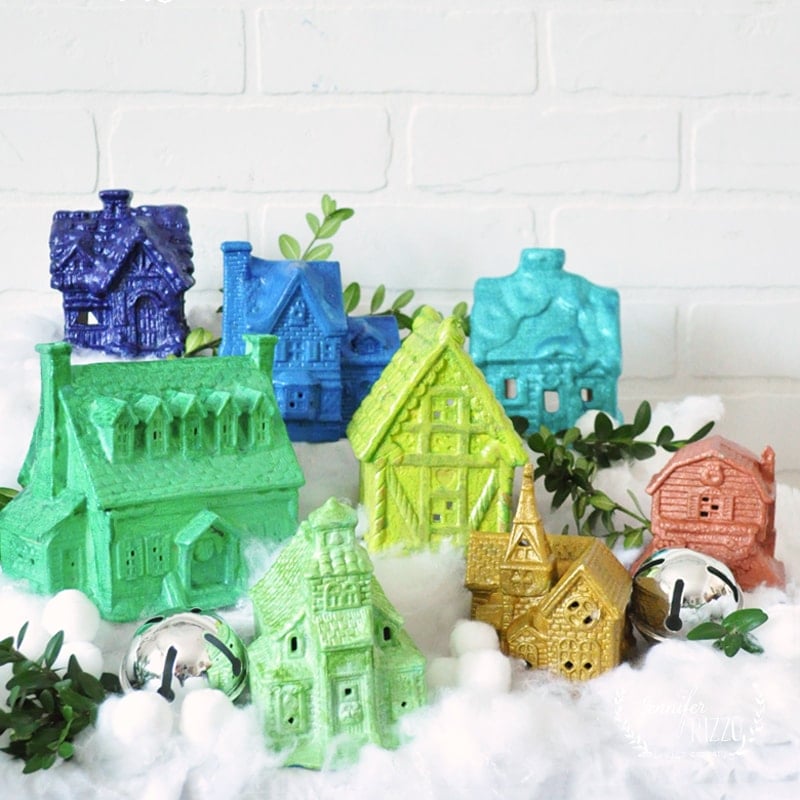
Once they dried, they had such a pretty shimmer and sparkle.

It was a fun to turn the village into a rainbow holiday decor!


Up close you can really see the shimmer of the Glamour Dust. It’s so pretty in person!


I put together a couple of charts so it’s easy to get the same look.

Below is the printable version.


Once my Christmas decor goes up, I am going to put my Rainbow Christmas Village on my mantel with Bottlebrush Trees, and some other fun holiday decor.
Let me know if you try this product, and what you think!


This post is sponsored by DecoArt, Opinions are entirely my own.
Haha, I have the one in the middle that is a gingerbread house with holes on the top to put candy canes inside. But believe it our not, I have many others that are totally different, how many did they make, haha.
It’s amazing how many they make that are different!