DIY Dowel Rod Accent Table
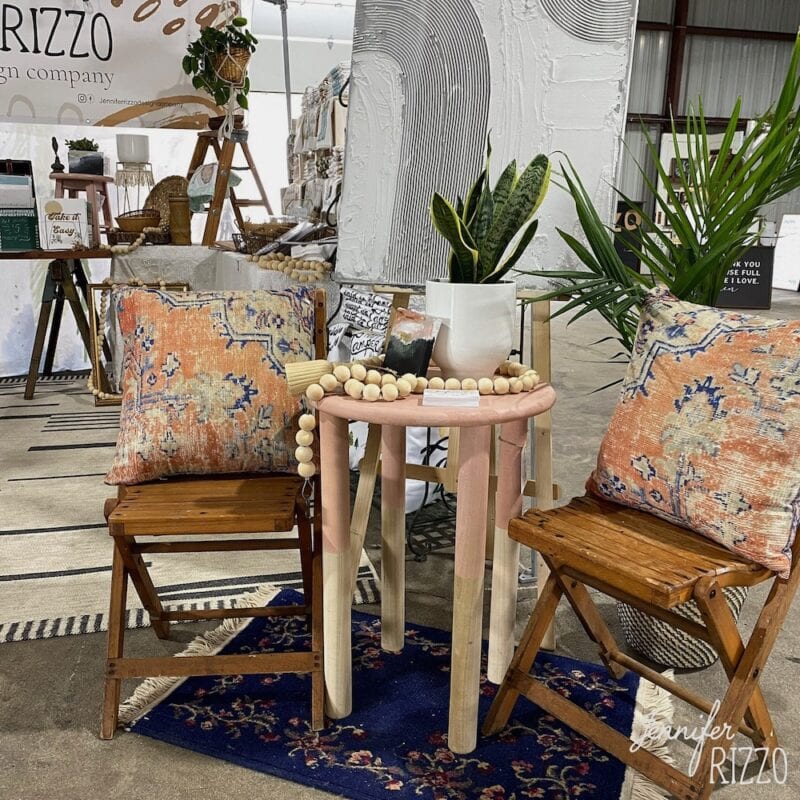
Don’t you love an easy DIY project that looks cute? I needed a small table for display at my last market, and couldn’t find what I was looking for. After a little wandering the home improvement store for a while (which Nick laughs at me about because I many times refer to it as “the hardware store”), I found the perfect items to make a small diy dowel rod accent table. At Menard’s I found 4-foot tall, 2 inch dowel rods for $11 each which I grabbed to cut in half to make 4 legs, and a finished wood 18 inch pine round for $9. They were exactly what I needed to create a small round boho style table .
(This post contains affiliate links. Please see our affiliate and sponsor disclosure here.)
Watch a fun video of the making process, or skip below to the post:
Supplies: 18″ wood pine round, 4- 2 ft dowel rods for legs, pencil, 2″ screws, wood glue, drill, safety goggles, painter’s tape, spray paint (we used Rustoleum in Blush Pink)
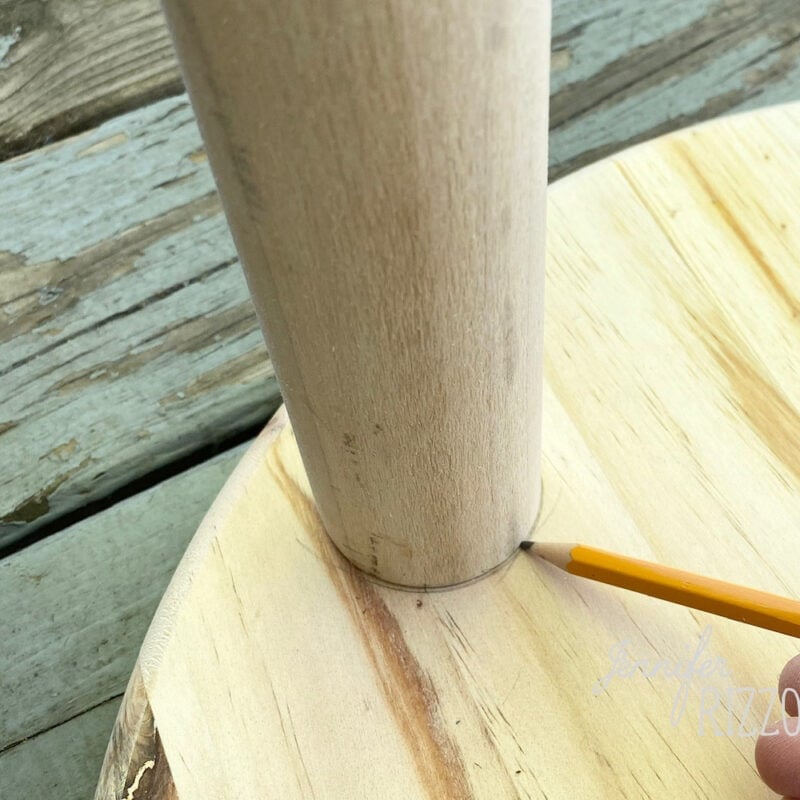
After cutting my dowel rods in half to make 4 legs, I first marked where I wanted to place my legs. I found the center and then evenly place my legs around the outside of my DIY dowel rod accent table. I used a pencil to trace the outside of the dowel rod so I could find the center of each leg.

I marked the enter of each dowel with a pencil for my drill point.
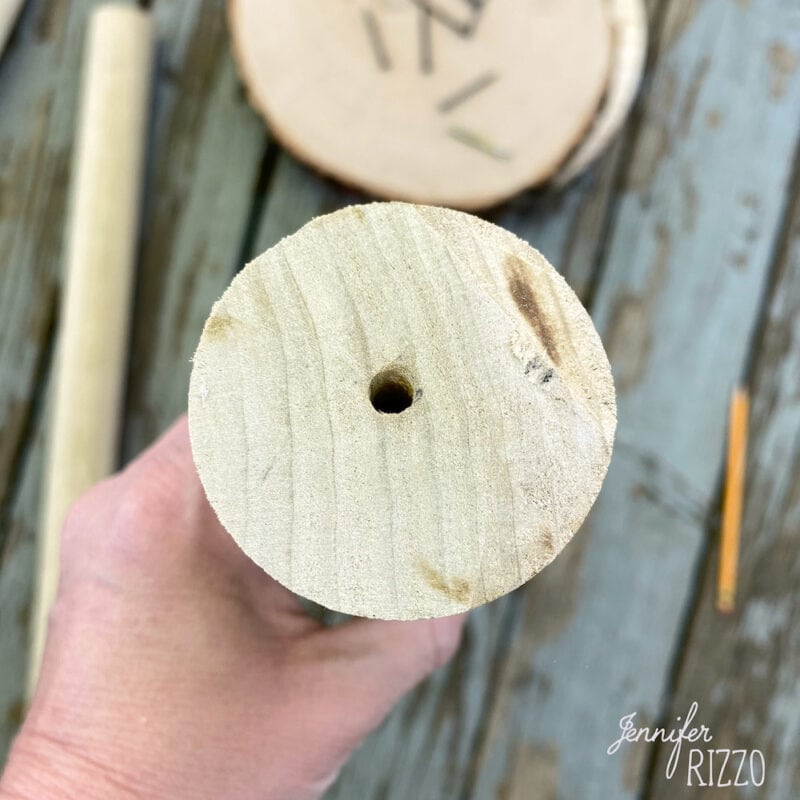
I then pre-drilled holes in both the top of the table and the top of the legs.This will help to keep the wood from cracking and ensure proper placement, which can be a challenge when screwing in the legs from the top. I then added glue to the hole prior to attaching to the top to stabilize the screw even more.

Having a helper hold the dowel rod so it didn’t shift, the top was screwed into each dowel rod leg to make sure the screw went in straight in the dowel rod. I repeated the same for each table leg. It helped to attach the legs opposite of each other for balance instead of legs next to each other. Make sure the screws are screwed in slightly below the surface, this way wood putty can hide them.
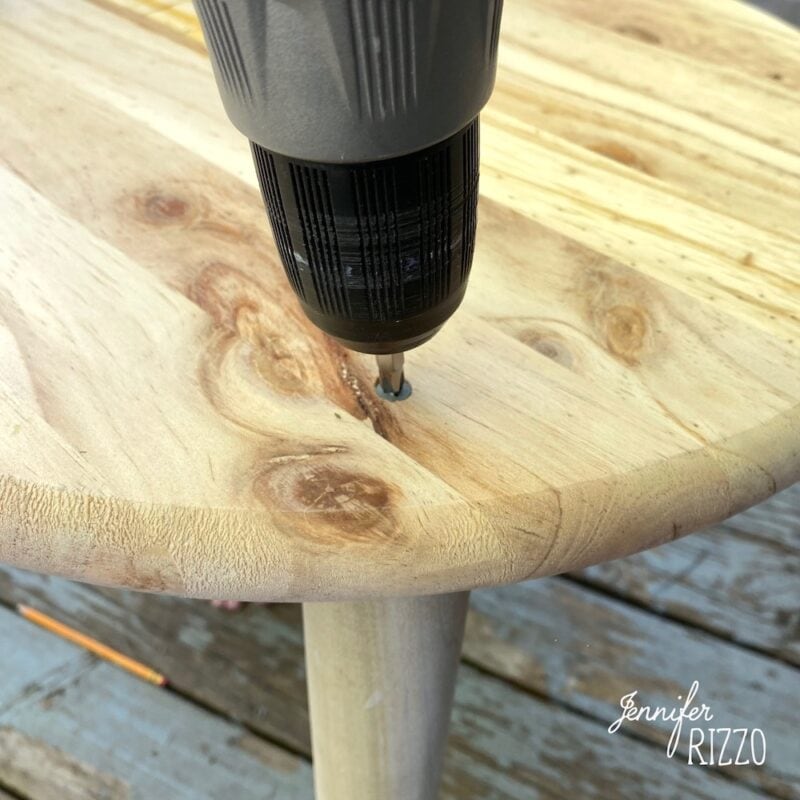
I let the glue dry and wood puttied over the screw heads. I made it as smooth as possible so there was minimal sanding.

Once the wood putty was dry, I sanded the surface smooth and it was ready to paint! I decided to make it a color blocked table and I wanted the legs to have a little natural wood showing at the bottom. I painted this table with a color blacked base years ago and it really updated it!
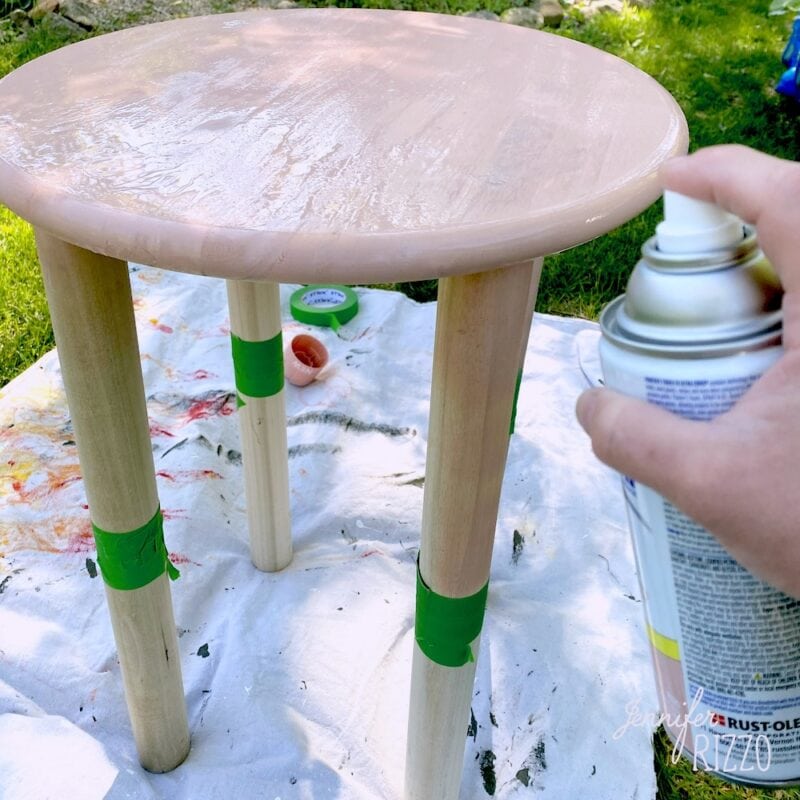
I thought pink would be a fun color. If pink isn’t your jam, then leave the wood natural or find another fun color!

It looked so cute in my display and added the perfect boho touch!
If you liked this post, you might also like: DIY table made from scrap lumber and fireplace wood.


How creative. I love making something to fit my needs instead of wasting money on something that’s not perfect! I would love for you to share on my weekly link parties! My readers would love it!