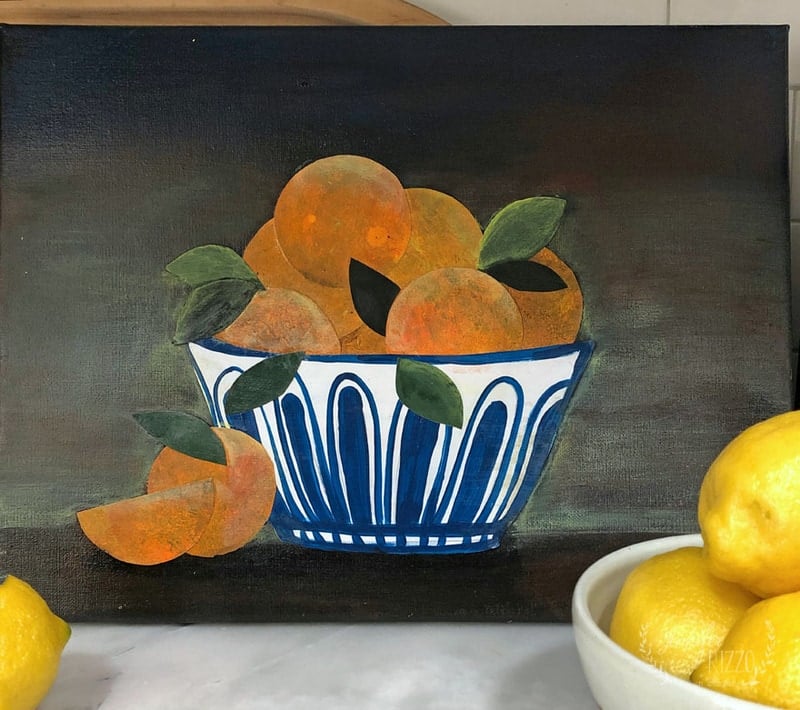
Create A Cut Paper Decoupage Orange Still Life Canvas
Summer is here, and I am so happy! It’s finally warm enough to sit outside, and bring in flowers from the yard like lilacs! It’s a good time to make small decor changes. Am I the only one who likes to add new art to their walls with each season? I wanted to add a new piece of art above my sub-level stairway. I always feel like it’s an area I look at everyday, and a beautiful piece of art should be hanging there. I loved the idea of a still life painting of a bowl of oranges. Oranges seem so fun for summer, don’t they? I decided to try and use an mixed media art technique to make cut paper still life art. I loved doing this project, because it gave me the chance to play with paint, paper, and decoupage medium. I really love decoupaging. I used to decoupage furniture, glass and fabric and haven’t done it in a while. The one thing I did forget was how decoupage glue seems to stick to your fingers, and you’re peeling it off hours later. This is a fun project and you really can play with paint and paper. The full tutorial and templates are below.

(This post contains affiliate links)
Supplies for creating Cut Paper Decoupage Orange Still Life Canvas
-Orange, yellow, blue, brown,green, white and black craft paint
-Card stock
-Paint brush
-Scissors
-Decoupage medium
-Paper towel
-Bowl, glass or circle template
-pencil
-Saw tooth hanger (optional)
Paint the background canvas with a mixture if brown, green and black paint. Paint a brown line on the bottom 1/4. Set aside and let dry.
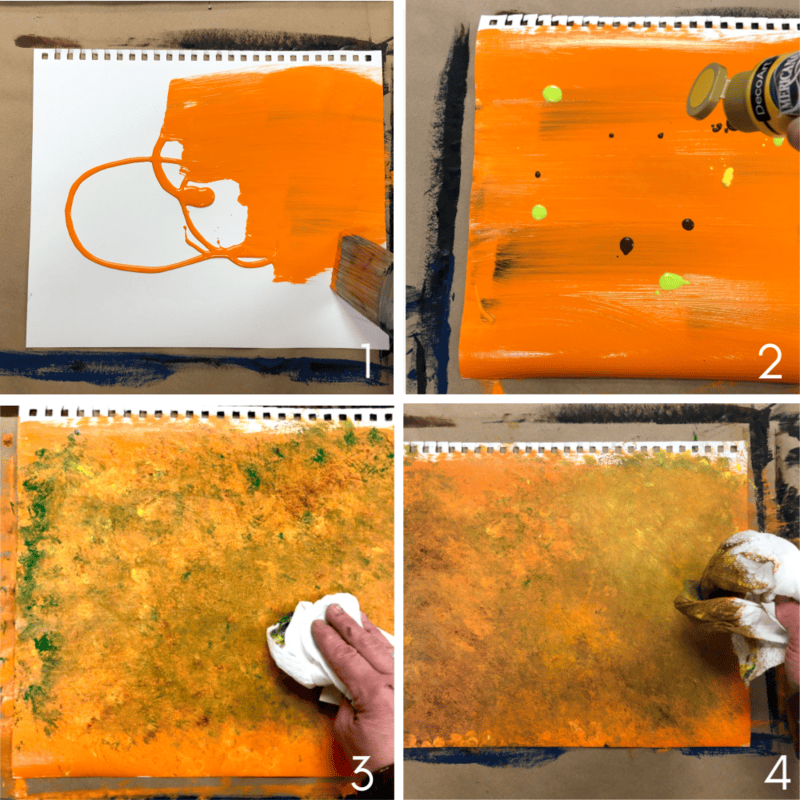
Create the Orange Texture
Paint the paper or card stock with a base of orange craft paint. Drip yellow, green and brown paint onto the orange paper and blot with a paper towel. Let Dry.
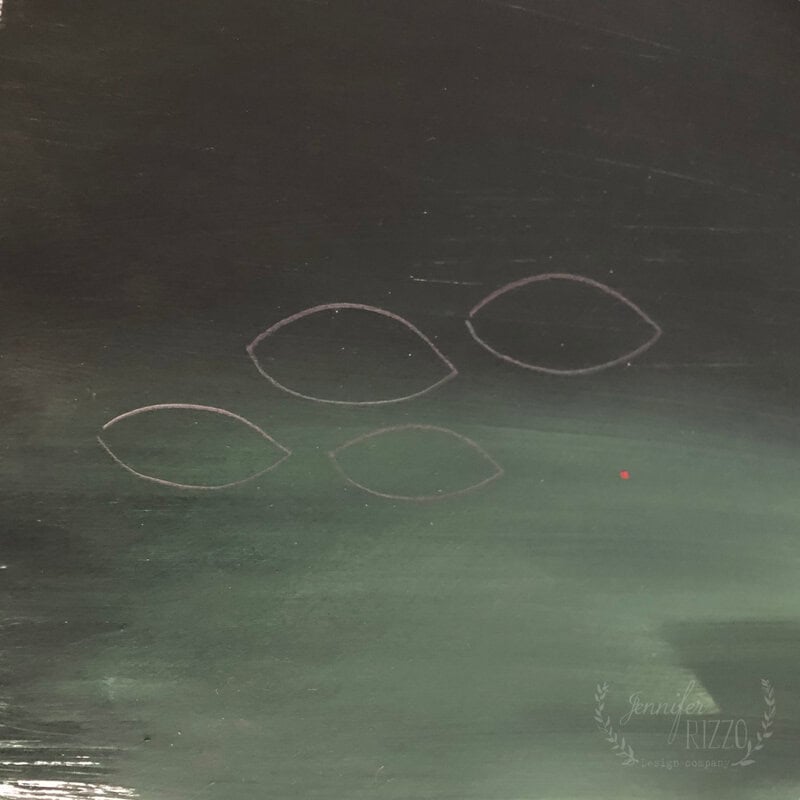
Paint the Paper for the Leaves on the Cardstock
Use the green paints to create a base for the leaves. Once it dries trace and cut out leaves (template below)
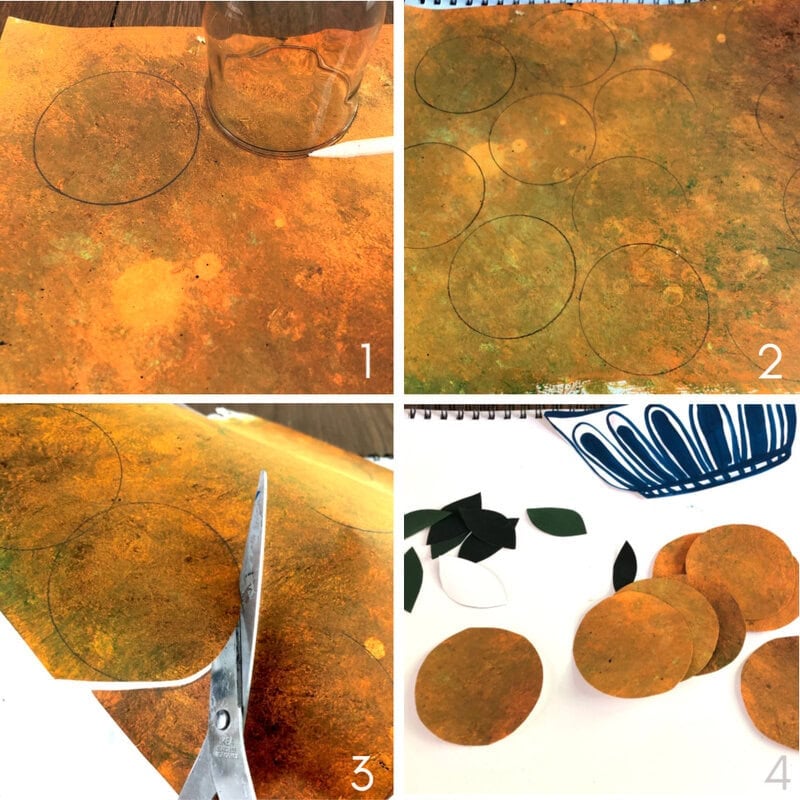
Cut Out the Orange Circles
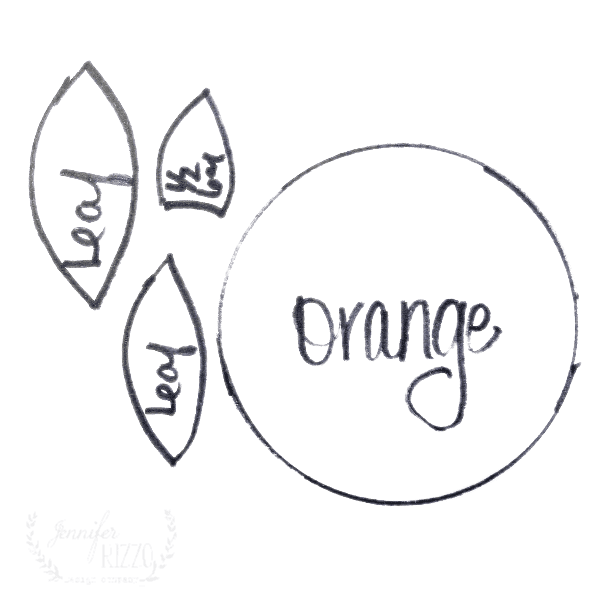
Use our template below to trace around the circle ( or a plastic cup!). Cut out each circle and set aside.
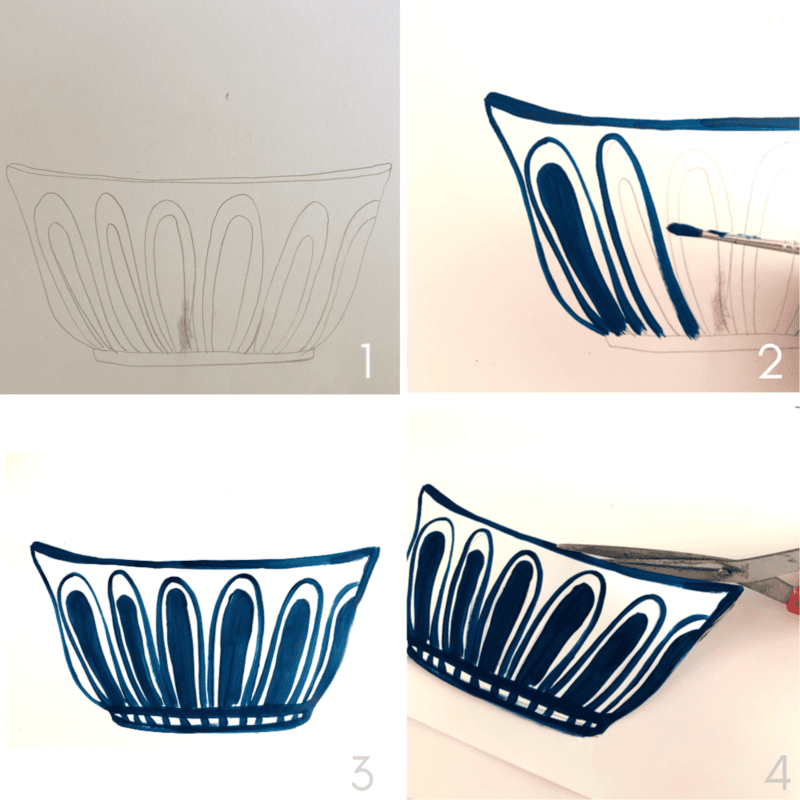
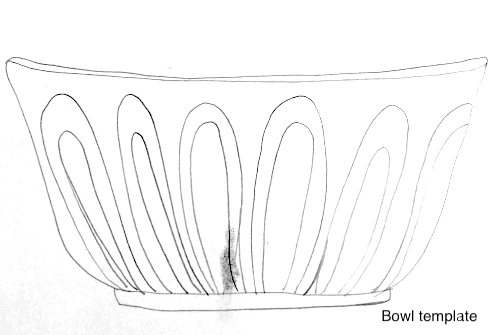
Paint and Cut The Bowl
Print the bowl template onto card stock or print and transfer the image (template at the bottom) . Paint, let dry and cut the bowl out.
Assemble the Cut Paper Orange Art
To assemble the bowl, start by clustering and gluing down the oranges in the upper 3/4 center area of the canvas. Add decoupage medium to the canvas and then to back of the orange circles. Press both decoupage coated sides together, then brush a layer of decoupage medium over the entire top.
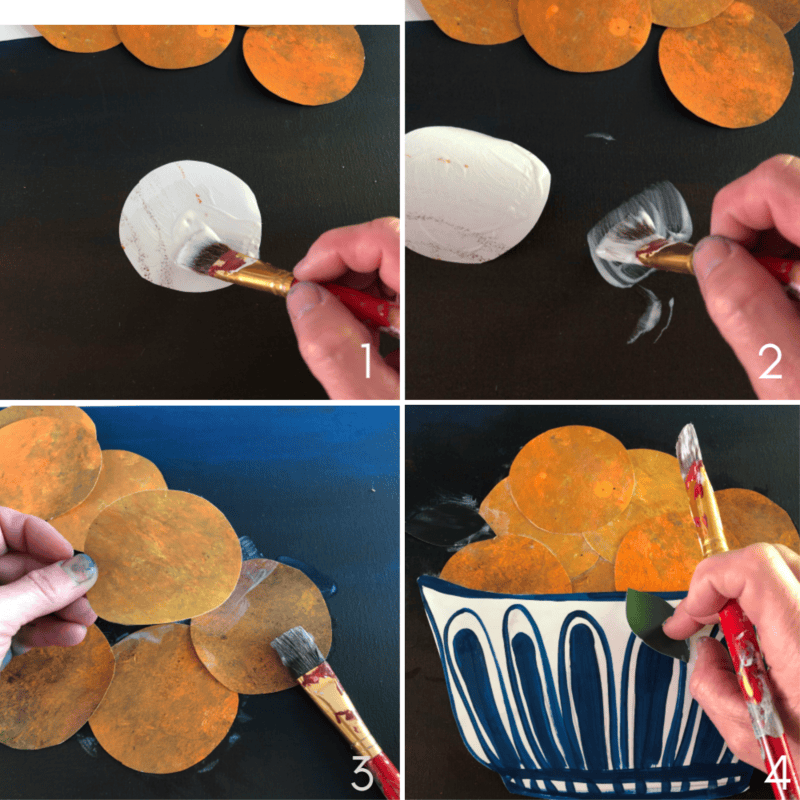
After the oranges are in place, decoupage the bowl over the bottom of the oranges so it appears they are sitting in the bowl. Finally, add the cut our green leaves. Brush a layer of decoupage medium all over the entire piece and let dry. You can add a saw tooth hanger to the back. You’re now ready to hang and display your art work!
I have all kinds of art around my kitchen, most of it from antique stores, or thrifted. I found the vintage brass number a few years ago. With 5 of us in this crazy house, it was perfect! I also have a miniature oil painting I bought years ago. It’s a great little piece of art for a skinny wall.
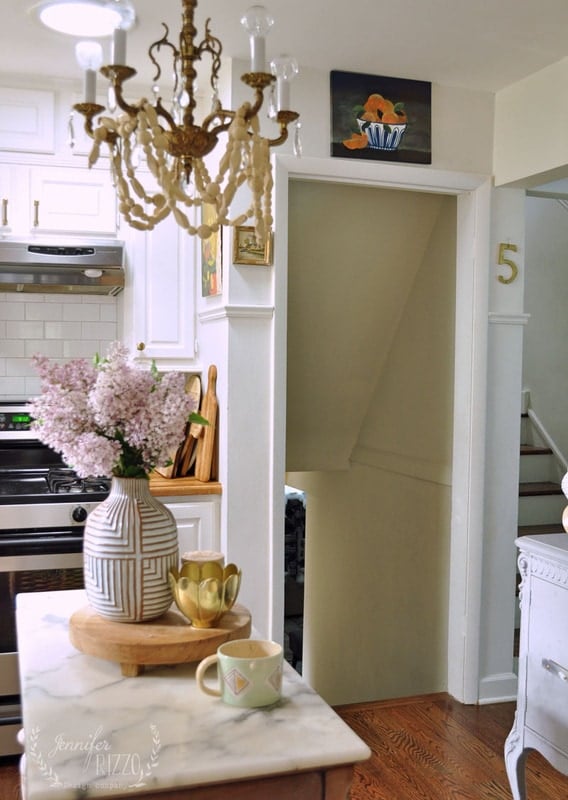
I love my cut paper art above the door, but a part of me wants to use one of those Command hooks to hang it in the area over my oven. I feel like that’s a blank slate, and could use some art. What do you think? It’s really a versatile project. You could easily make one with lemons or pears as well.
If you don’t want to make your own, you can buy a canvas and pillow version of it in my Society 6 shop, or even a serving tray. If you love this art technique, you also might like String Pull Painting.
Templates:

Super cute and I love to change out artwork too…it makes me happy. It’s the little things right
It makes me happy too! I totally agree!