Easy DIY Clay Mushroom Ornaments
The mushroom aesthetic at cottagecore seem to be one of the hottest trends this year. I’ve always loved mushrooms and a few years ago I shared how to make easy DIY clay mushroom ornaments in my book Creatively Christmas. based on the red mushrooms amanita muscaria that grow under pine trees. Mushrooms themselves are seen as a sign of good luck in some cultures, and who doesn’t need more of that? They also add a touch of whimsy and magic. I thought it was the perfect time to share that tutorial here, because fungi of all shapes and sizes are just the cutest bit of holiday decor or hanging on a Christmas tree!
This post contains affiliate links including Amazon affiliate links. See our sponsor and affiliate disclosure here.
To make your own clay mushroom ornaments, you need just a few supplies:
Air dry clay, red, tan and white craft paint, glitter, a paint brush white craft glue and twine or ribbon. You can find all of the supplies here. You can also use the mushroom making technique to create polymer clay mushrooms for the perfect addition to your fairy garden or terrarium.
Start creating your mushroom by forming it with air dry clay
You mushroom making begins with molding the stems and caps out of air dry clay. The top of the mushroom is formed by making a ball of clay and flattening one side so the other side keeps its rounded shape and oyu end up with a slightly flat circular shape. To make the stem, roll out a long cylindrical shapes and roll one end slightly more so it tapers at one end.

In the flat part of the mushroom cap (the underside), use the pointed end of a paint brush while the clay is still wet to make a hollow where the skinny end of the mushroom stem can fit into when the clay is completely dry. The clay can take up to 24 hours to dry before painting (you can also cover the cap in fabric for a different look with decoupage.).
Using Christmas mushrooms in holiday decor is an old German tradition that signifies good luck and fortune and were used in old world Christmas decor.

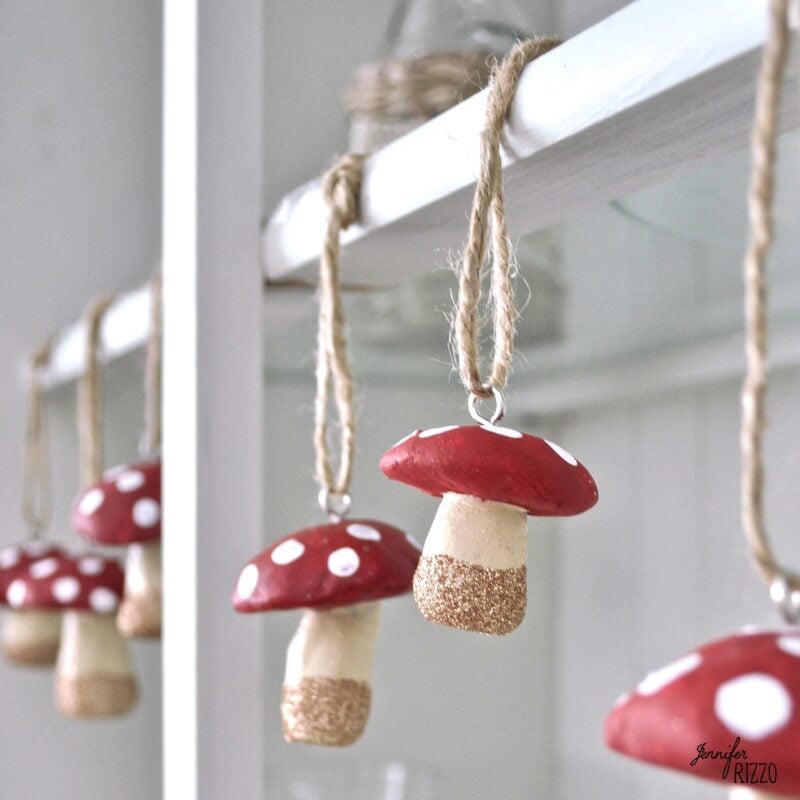
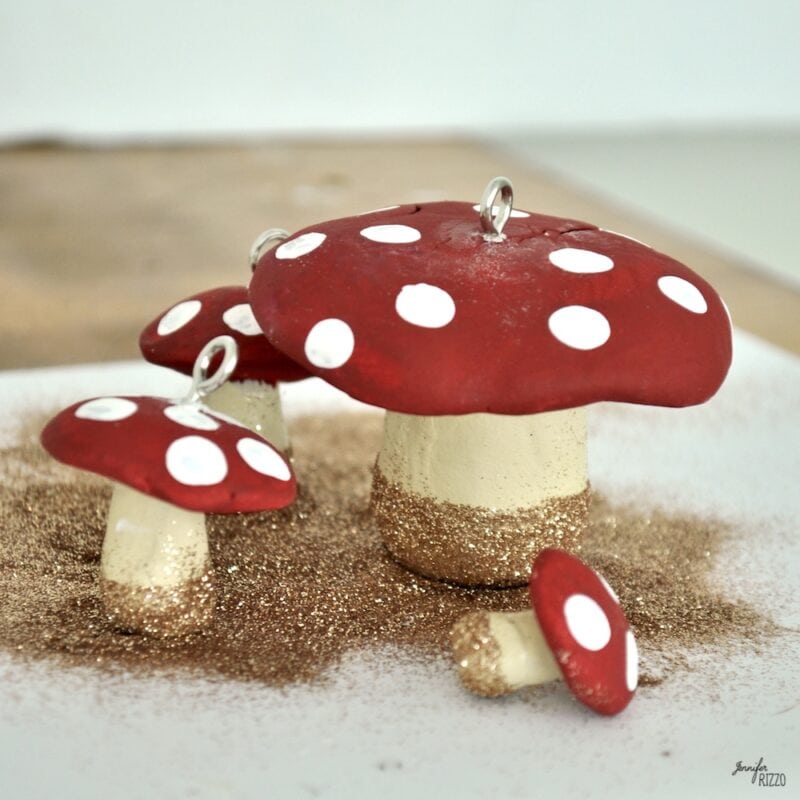
Once the tops and bottoms are dry, you can glue them together and let dry before painting. I find this works better than trying to form the mushroom in one piece. White craft glue also works better than hot glue to attache them together and is much easier to paint over. Once the glue is dry, the lucky mushroom is ready to be painted! I chose to paint my mushroom tops red and my bottoms a light tan color, but since they come in all kinds of different colors, feel free to be creative and paint them any shades of color you like and create cute accents!

When the acrylic paint is dry, now is a great time to add you small eye hook in the top. The clay is soft enough that they screw right in. If you want additional reinforcement, add a few drops of white craft glue to the screw part before hand.
A few recommendations: To make air dry clay mushrooms to add to other kinds of decor, omit the eye hook and use a toothpick in the base. They can be placed in dry floral foam or other dry arrangements. Also, make sure your clay is completely dry before painting. Store in a cool, dry place to use from year to year.
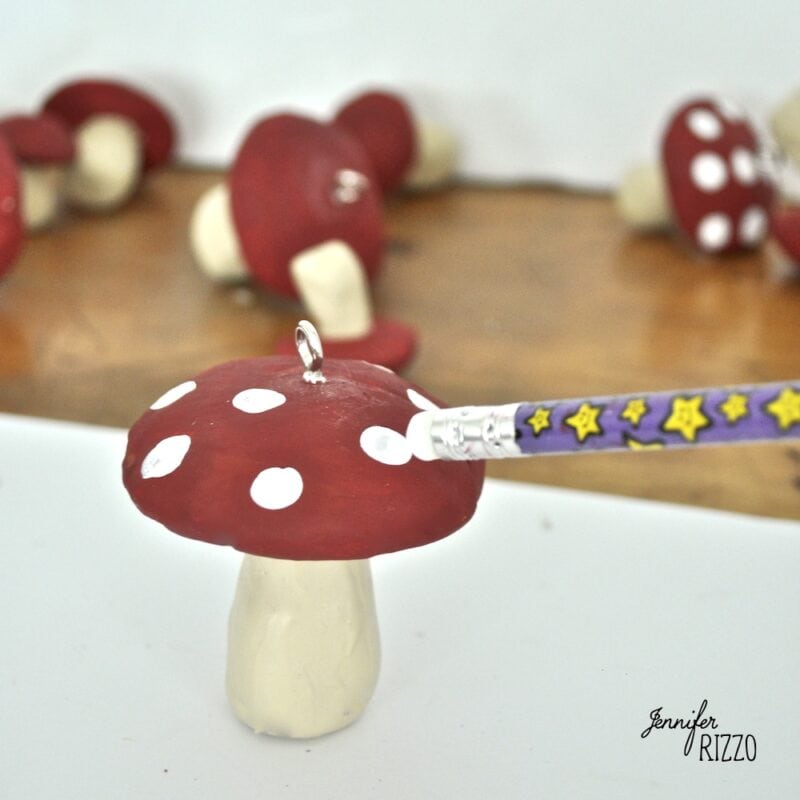
To add the typical “forest mushroom” look, I added a few drops of white craft glue to the top to make dots. I found it was very easy to do using a pencil eraser dipped in paint. After the top dried, you can add a bit of glitz and texture by adding glitter. Brush glue around the bottom of the stem with a paintbrush and then sprinkle glitter all around the bottom for a little sparkle. If adding more glitter it’s better to work in layers instead of trying to add too much at once.

After the glitter dries, shake off the excess. You can hang your mushrooms from a pretty ribbon or piece of twin by creating a loop with a knot in the top and hang on your tree or create a present topper. Mushrooms are also great year round decor too and you can make some to use in your spring decor as well, like these crepe paper mushrooms.
I hope your mushroom ornaments bring you some good fortune on your tree! If you loved these easy handmade clay mushroom ornaments you can DIY here are more Christmas ornaments ideas and inspiration such as how to make these rustic modern glitter ornaments , or learn how to make hanging snowglobe ornaments.
