How to Make a DIY Ghost from Rope Wall Decor (No Macrame Required!)
I love a fun DIY project that uses ordinary supplies to make something really amazing and cute Halloween decorations. This DIY ghost from rope wall decor is the perfect little bit of decor that can brighten up your wall or front door to welcome your trick or treaters! I love that there are no macrame skills (because there are no knots needed!). This project uses a few simple supplies such as white cotton rope, a wood craft round, black felt and hot glue. I trimmed the bottom of mine a little bit differently from other examples I’ve seen online for a more modern look in an oval shape, but you can make yours as scary or as cute as you like! You can watch the video on this post to take you through the entire project of making your non-macrame ghost, or you can visit the step-by-step instructions below.

This post contains affiliate links. See our sponsor and affiliate disclosure here.

Supplies to Make Your Non-Macrame Rope Ghost Wall Hanging
You can find many of these supplies at the dollar tree. I’ve seen other tutorials that use foam board or a round ire wreath to create these fun rope ghosts. Find supplies on Amazon.
A wood plywood craft round-size will depend on how big or how small you want your ghost to be, mine is a 12 inch craft round.
Black felt with adhesive backing
Hot glue and hot glue gun
White craft twine or rope

Step 1: Cut and Glue Your Rope to the Craft Round
Begin by measuring out your first three pieces of rope as to the length you want your ghost bottom to hang. My first pieces were approximately 5 feet long. You want to leave them a little bit on the longer side for trimming later. Only cut the first three pieces because as you move closer into the center of the ghost, the pieces will become shorter, and it will waste rope if you trim them longer. My interior pieces at the end were only 33 inches long.
Hot glue the first three pieces on to the word round, starting at the edge, gluing them as close as possible to each other (Always be careful with hot glue not to burn your fingers.!). Continue to glue rope pieces working toward the inside. When you get to the center, you may either have to glue on a single piece of rope in the center or you might have room to do a double.

Once all of your pieces are glued on, flip the entire ghost over and glue from the back. Once all your pieces are glued on, you’re going to want to run a bit of hot glue across the back of the rope. This will hold the roof together on the back, and it will stop your rope from and twisting the rest of the way.

Step 2: Trim your Ghost Length at the Bottom
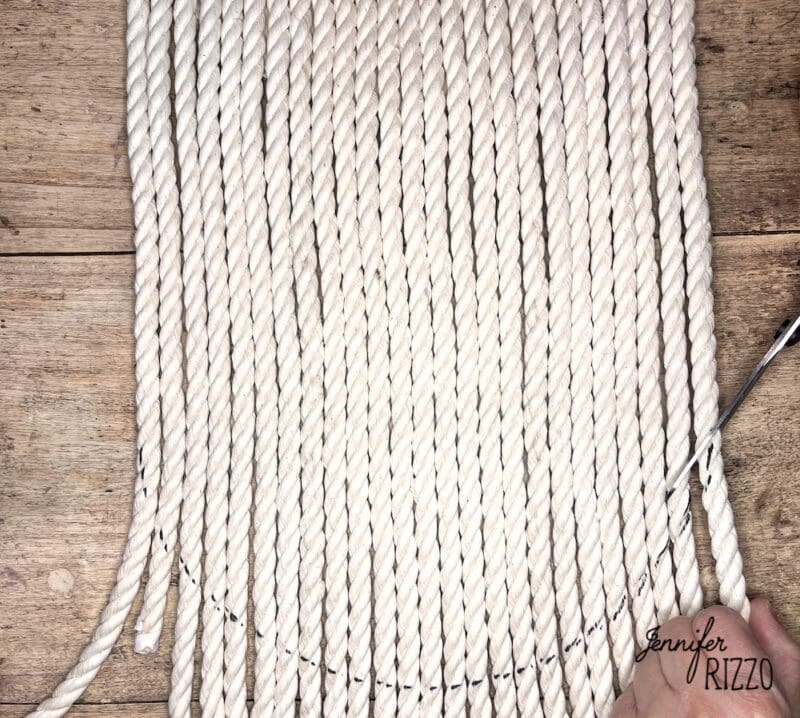
Once you’re hot glue has dried, flip your ghost back over to the front If you want to create
a shape like I did as more of an oval,use a black marker to your rope and cut them to length and untwist your rope pieces. If you want to leave your wall hanging as more of a traditional ghost shape flat across the bottom, you can start untwisting your rope.

Step 3: Cut out and adhere the felt eyes to your ghost decoration
Using adhesive backed craft felt makes placing the eyes really easy! When your rope is untwisted cut out to ovals for the eyes. If you want a different shape or expression, see how to paint a ghost here for a printable template. After cutting out he desired shape, remove the backing on the felt and place! The nice thing about the adhesive felt backing is that it’s sticky enough to stick, but can also be adjusted a few times if needed.

Step 4: Add a Hanger to the Back to Create Halloween Wall Decor or Door Decor
I used an extra piece of rope that I had trimmed as my hanger glued to the back of the word round.
After that, you can give your cute ghost rope a home on your front door or on your wall! as a fun welcome to a spooky Halloween party or to welcome your guests as a part of your outdoor DIY Halloween decorations now that you’ve learned the steps How to Make a DIY Ghost from Rope Wall Decor!

Tip: if using this outdoors, make sure it’s in a covered area. like a front porch.
It’s almost that time of year to bring out the orange pumpkins, candy and tricks and treats! For more Halloween crafts and decor, see how to make these fun witch hats from canvas, or use a plastic spider to create spider webs from yarn and an embroidery hoop.
You can also decorate you Halloween mantel with skeletons and faux candles by creating these spooky luminaries!
Looking for easy T-shirt costume ideas? Try this Charlotte’s Web inspired costume.


What’s truly charming about this DIY project is its versatility. Halloween decor doesn’t always have to be spooky; it can be whimsical and fun, just like your adorable ghost. I can already picture it hanging in my home, adding a touch of seasonal charm. Thank you for sharing such a creative and approachable DIY idea.
OMG that ghost is just TO cute haha love it:) /Maria
Thank you!