How to Press Flowers with Books
One of the joys of buying vintage books is when you get them home and start thumbing through them. Occasionally I’ll flip open to a page and find a little treasure like long forgotten pressed flower; hand-picked and lovingly preserved in old books that are older than 1900. It really speaks to a small a special moment in time. It’s so easy to press flowers with books and patience and preserve your own little blooms! I recently gathered some early blooming spring flowers, and I’ll have some projects coming up using them! Check out the rest of this post for the tutorial of how to press flowers with books!

(This post contains affiliate links including Amazon affiliate links. See our sponsor and affiliate disclosure here.)
To press flowers, you’ll need:
Fresh, gathered flowers
Heavy or large books
Parchment or regular paper
You can find books and supplies for flower pressing and crafts here.
You can also watch a flower pressing video included in this post, or skip right ahead to the step by step images below:

Start by gathering your flowers that press well
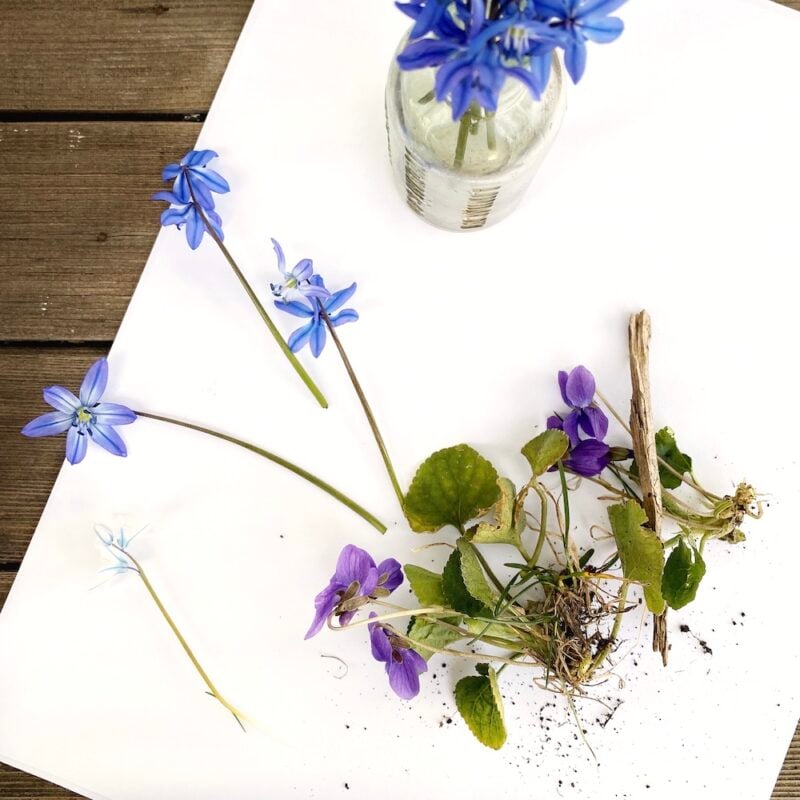
While you can press any flower, thinner “less juicy” single petal flowers tend to work better when you press flowers with books. Flowers with a higher moisture content can actually go a little moldy, since they don’t dry fast enough. I started with the earliest spring flowers we had which are violets and blue squill. It helps to gather them by snipping them off with a pair of sharp scissors or a knife. If you are going to press the stem, make sure to clip it as close to the ground as possible. If you are only going to do the top of the flowers, snip it as close to the base of the head as you can.
Other flowers that “press well” are ones that tend to hold their color, and single layer flowers such as cosmos, yarrow, lavender, violas, pansies, impatiens, poppies, zinnias, daisies, and shrub roses. You can also extend beyond flowers and move into foliage. Ferns, leaves, and other greenery (if it’s thin), can be pretty additions to your pressed flower art.
See how you can use pressed flowers to embellish a vintage family picture in a frame in this post.

Make sure your flowers and clean, dry, and pest and mold free. Remove any stamens that are heavy with pollen and might stain your flower. You can press directly between book pages, but if you were going to be making them in a large scale, or are worried about damaging the pages, use either plain white paper to press between the book pages, cardboard, sheets of absorbent paper, printer paper,parchment paper, or even paper towels. Basically you are creating your own flower press!

Place a piece of paper on a cookie sheet, or a bottom book or board, then the blooms on the paper, leaving space between flower to circulate air. Plus, any flower that are overlapping might be stuck that way when dried.
Think outside of fall decor, and decorate pumpkins with dried flowers!

Place a second sheet of paper on top, and then 3-4 heavy books on top. When I am pressing a lot of flowers, I press mine between multiple books using layers of paper. I would say old phone books would work, but do we even have those anymore? Old dictionaries might be a better bet, or clean bricks if you’re really in a pinch! After they are pressed together, put them somewhere you can leave them be in a cool place your house for a couple of weeks, undisturbed. out of direct sunlight so the drying process can start That’s when the magic happens as they slowly dry out and flatted by the weight of the books. Leave them alone with out checking for at least two weeks, if not three.

When those long three weeks have passed, carefully lift the books and paper. You should have perfectly pressed flowers! If they are flattened, but don’t seem dried out enough, you can leave them in open air to finish drying. It’s important that they are totally dry before storing so they don’t become moldy. To store, lay them between sheets of parchment paper or even flattened coffee filters and place in an air tight container. I like to sandwich them between flat cardboard so they don’t become damaged before using them for a craft project. You can even throw in some of the little desiccant silica packets that seem to fall out of everything from shoe boxes to pepperoni to help keep them moisture free.

Then you are ready to create or use your pretty pressed flowers in all kinds of projects! They do have a delicate texture, so pick up with care. Or, you can tuck them in a book for someone else to enjoy in the future! Dried, pressed flowers can be used to create lots of projects including art, booksmarks, decoupaged projects, embellish journals, greeting cards and even decorate battery operated candles and Christmas ornaments!

If you love botanical art projects, see how we made:
Large scale botanical art prints,
free flower and bird printable,
or create a terrarium from a old clock case.

