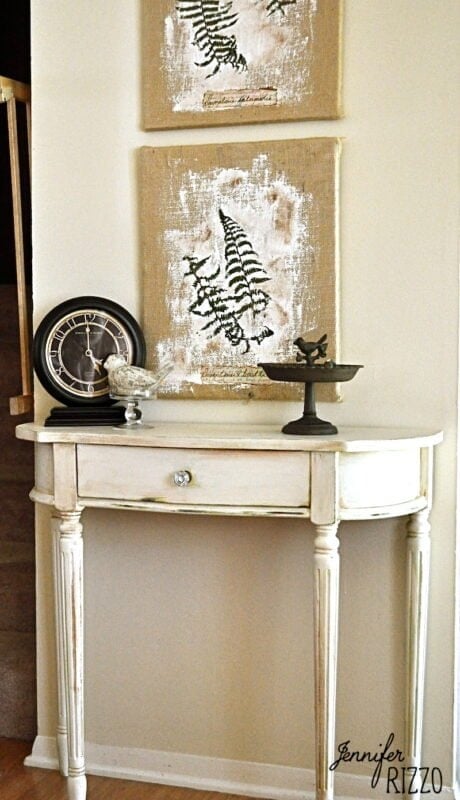
Easy Pressed Ferns and Spackle Texture Art
Textured art is super popular right now on Instagram and it was worth revisiting this project because I loved it so much! Most of the time texture art uses spackle or drywall compound as a base on canvas. Spackle such a great , light weight medium to use, and you can pair all kind of of art styles with it. I wanted to share with you this easy pressed ferns and spackle texture art that you can create for DIY art. It has a great botanical feel, and is really inexpensive to create!

To make this pretty and natural fern texture art, you’ll just need a few supplies: A blank canvas (mine is wrapped in burlap, but you can also leave it plain or paint the background with acrylic paint), pressed, dried ferns, spackle, a putty knife, brown craft paint , brown ink pad, and paper to create a label.
If you’ve never pressed ferns before, see this post on how to press flowers with books.
Start by spreading the spackle thinly on the center of the canvas with the putty knife or even a large palette knife. Make sure to leave some texture in the spackle. This will help the ferns adhere and for the paint to grab to age the art later. While the spackle is still wet, gently press the flowers into the wall board compound. If you aren’t able to press your won ferns, you can find them pressed and preserved on-line.

After the dried ferns are pressed into the spackle, let dry. The dry time could take up to 24- 48 hours depending on thickness. If it seems like the ferns are lifting on the edges, put a few dabs of white craft clue on the backside and adhere to the canvas and let dry.

While the spackle is drying, you can create a really cool vintage looking label, like botanical specimens of the old days. I used a copy of a vintage letter that I tore the edges of and wrote the botanical name for ferns in cursive on with brown ink. To get the aged look on the edge of the paper use a stamp pad. See how you can age paper on the edges in more detail here.

Once your easy pressed ferns and spackle texture art is completely dry, use a small amount of watered down brown paint and add some “age” spots. Make sure to add them lightly, it’s hard to undo. I just added the smallest dab of paint to a paper towel and rubbed it on with my finger. Once that paint is dry, it’s time to hang and enjoy! The background has a really fun organic, plaster appearance. I made these years ago and the best thing about botanical art is it that it’s always timeless.

I think they look really high end! I sold them a few years ago, and now I want to make myself a new set! To create more botanical texture art you could use this technique with ferns in reverse and create impression art like I did in this post.

It’s fun to see this wall with such a light color, since it now looks like this. It’s like looking at a time machine!

If you are reading this post at any other sites or blogs besides Jenniferrizzo.com, your rss feed,e-mail or in your reader this is stolen content.
*This was posted Via Jennifer Rizzo. com

very, very cool. your mind works in very creative ways! I never would have thought of that but it really works!
Perfect Combination ~ A R T !
Okay, I like what I see and I want to see more please!
Love your art! Totally
fern-tas-tic!
smiles, alice
Soooo beautiful! Love the texture and natural elements!
Enjoy!
Cathy
that is a really cool look.
Yes, I do agree, you are one very creative gal! I want to see more.
Please stop by and enter the jewelry giveaway!
those are awesome jen!!!
I like this idea, like all your others. This looks great! Good job!
I was thinking about your sewing machine the other day. You could also take some of that canned air and blow out the area where the bobbin goes. I take the whole shuttle off and blow it out. Seems dust bunnies like to make nests in there also!
wow! they are really terrific! love the way the green pops! hope all is well 🙂 susan
I…LOVE…IT!
Debbie
I agree with Alice: fern-tas-tic!