Raised Bed Galvanized Stock Tank Planter
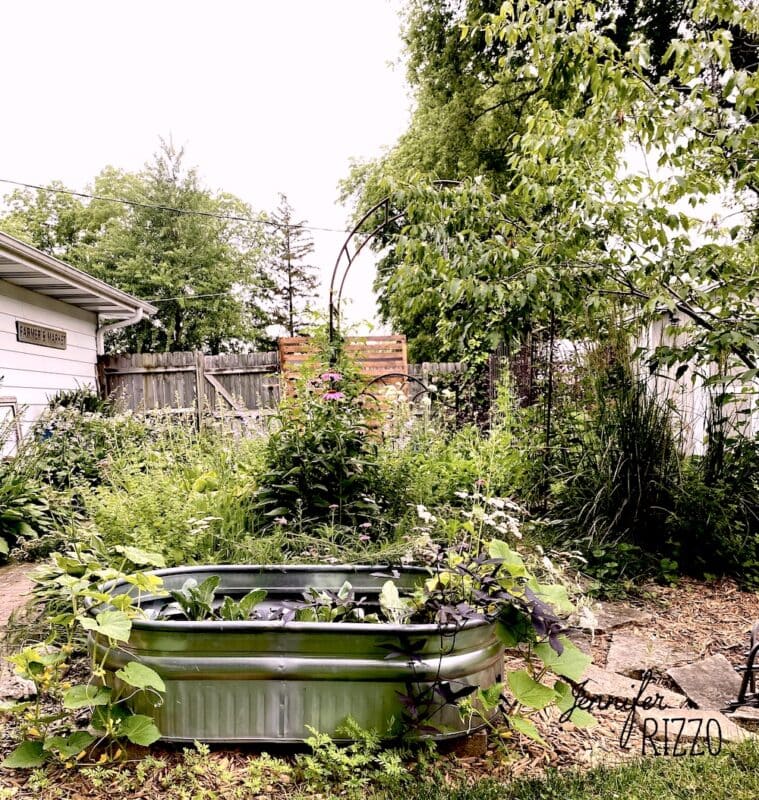
I’ve been really intrigued by the use of stock tanks as metal water troughs for animals as pools, and I started thinking about how smaller stock tanks would be the perfect use for a raised bed planter! I started doing some research about making a raised bed stock tank planter, because I knew that galvanized metal is coated with zinc. After doing some research, and reading about the pros and cons of planting in galvanized metal, I decided to give it a go. To find out about the mistakes I learned with the stock tank planter and some tips, go to the bottom of the post where I talk about what I learned after my first and second growing year of my stock tank garden.

This post contains affiliate links. See our sponsor and affiliate disclosure here.
We bought our stock tank at our local Farm and Fleet, but you can also check your local tractor supply company or local hardware store. Here is a link to one brand on Amazon if you don’t have one near you (You can certainly get anything on Amazon!). At F & F It was the smaller of the two sizes they offered and ran about $70. Even though I really wanted a bigger one, I didn’t want to make a huge investment if it didn’t work out.

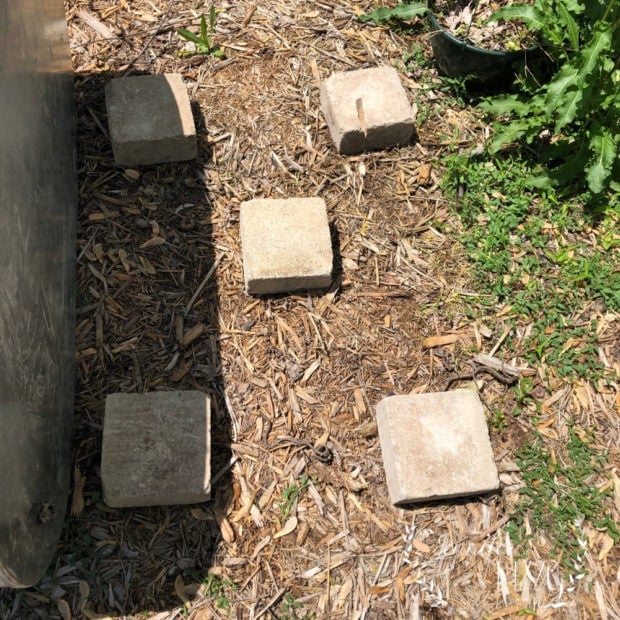
Some of the tips I read about making the planter, was that there should be some kind of low blocks underneath to insure proper drainage from the bottom. I bought some landscape blocks at the home improvement store for about $3 a piece (cinder blocks would also work) . I placed them so the edges would be supported the sides of the tanks as well as the base with the weight of wet dirt and plants. I used bricks that were low so there was less chance of tipping.

It’s important to drill drainage holes in the bottom of the trough planter at base of the stock tank so it doesn’t become a swampy mess. Use a 1/4- 1/2 inch metal drill bit. Make sure to wear eye protection and take proper safety steps since you are drill though galvanized stainless steel metal and there will be shavings. Wear gloves too!

After my drainage holes were in place. I added a few bags of organic dirt at the bottom of the stock tank. Some sites recommended using a layer of gravel as a base, but I didn’t want to add to the extra weight of my planter. You can also layer and add a couple of inches of filler materials like brown material first like straw or hay. I don’t recommend a filler such as styrofoam if you are going to be growing vegetables because of the chemicals. Only use this if you are not going to be growing edible plants. Keep to organic soil or potting soil for gardens. You can also layer cardboard at the base as it will eventually break down.

Most of the sites I referenced suggested because stock tanks retain heat, those type of plants like tomatoes, peppers,herbs, strawberries, zucchini and and eggplants thrive in them, because they love the heat. They also mentioned the planters can not only dry out faster, but can get hot in the sun (they are metal). It’s something to keep in mind if you have littles or pets running around, to make sure it doesn’t get so hot in the sun you’ll get burned if you lean on it like a hot car. I’ll let you know how it does this summer, and if it gets really hot or just really warm once we hit those 90 degree days in August. Also, make sure the depth of you garden soil fills at least 3/4 of your stock tank. Any lower and the plants can get overheated by the metal.
Tip: After a full growing season of using my stock tank planter I found Yes, stock tank planters dry out much faster than I thought and need to be watered more frequently. Add a drip irrigation system or watering system if you don’t want to hand water as often.

I planted two varieties of tomatoes, herbs and peppers the first year.

I also added a few basil plants as well.

I’ll be curious to see if they do any better than the plants in my regular raised bed garden. I added a tomato and basil plant there also to compare.

Because the stock tank is about 4 feet by 2 feet, really, it can only fit about two tomato plants once they get to their full size. It looks a little empty to me right now with the smaller plants, but I know it will fill in quickly. I realized after the first year my soil depth wasn’t big enough and had to add more dirt the second year.

Those yard bunnies have no fear and will eat and nest in your garden! Cover it all!
I should know in a week or two if everything is growing well. If they do, I would like to add a few more tanks. I’m hoping this will keep some of the ground pests out of some of my plants. I also think a raised bed stock tank galvanized planter would be a great way to grow salad greens, and keep them away from the bunnies. I also found out after about 3 years that rabbits can hop right in them and have themselves a nice snack on my lettuce. I also had one bunny try to make a nest, because it was nice and enclosed so I ended up adding wire mesh to the top of my planter, and you can see in the video she still tried to get in the stock tank planter!

Some tips and insights to learn from after the second growing season in the galvanized stock tank planter
The biggest thing I learned after the first year is that you can have too much sun! In the full on sun, all day, southern, no-shade exposure the planter itself became too over-heated and dried out too quickly. It needed to be frequently watered, and if you don’t have enough soil, the plants burn. The second year, I started trying green beans to rotate my veggies and they hated the container. I ended moving the entire planter to a southern, morning slightly-dappled shade with full sun mid-afternoon exposure closer to my patio and everyone was much happier. I grew cucumbers, cauliflower and sweet potatoes and everything did great. Hand-watering was also much easier since it wasn’t as often. My seedlings also didn’t languish, and flourished. Next year I’ll keep it in the same place and plant salad greens, beets and carrots to rotate my plants.

If you like this post, you might also like:
Our Garden and Tadpole Habitat


These make the best container gardens and that size is beyond perfect, love this!
Tanya
https://twelveoeightblog.com
Thank you so much Tanya! I love it!