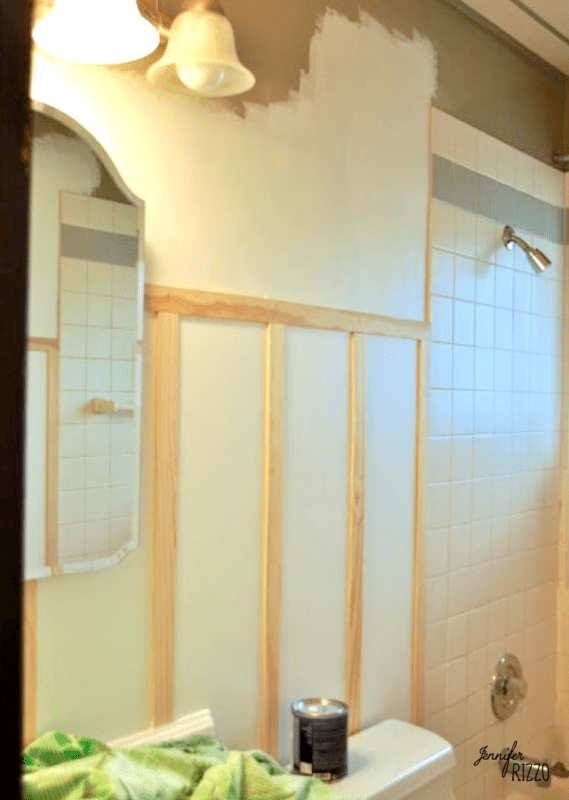
Board and Batten on the Bathroom Wall
I also wanted to share the bathroom progress with you! We recently removed the old tile and installed board and batten on the bathroom wall. I love how it looks already, and it was such an inexpensive upgrade!

Tile is down! We found weird holes in the wall behind the tile in different places. It was kind of crazy. Hole from an old toilet paper holder? Tile over it! Old laundry shoot? Leave the shoot in place and go over it! The amazing thing for all of my complaining about thing breaking in our house, we’ve found out it’s really well built. The walls are wire mesh with concrete over the top! Great for construction, and non-molding, bad for trying to break into a wall. 🙂 We opted to space our board and batten about 13 inches on center, and 5 feet off the ground to cover where the existing tile was.
We knew board and batten on the bathroom wall would really upgrade the space for under $40

Drywall is up and primed. What a difference already! We’ve added board and batten and trim to quite a few places in our home including our bedroom and crown molding in our living room. I just love how trim makes such a huge difference. IN our guest bathroom downstairs, we added a wood ceiling and love how organic it feels.
Check out: How we installed our foam crown molding

Adding the board and batten was a bit of a challenge with the concrete over wire lath, and it was hard to demo the wall which is why we opted instead to go right over the old wall with the wood slats.
We’ll be painting the board and batten in the bathroom BM White Dove. the wall above it and the tiled shower area will be and Martha Stewart’s Dolphin Grey for the top. I hope to get it painted soon to show you the finished product! In my head these projects always go faster than they do in real life
You can see the final bathroom reveal here
And see what that bathroom looks like today.

If you are reading this post at any other sites or blogs besides Jenniferrizzo.com, your rss feed,e-mail or in your reader this is stolen content.
*This was posted Via Jennifer Rizzo. com

Congrats to the winners!
Jen,
I bet you are so happy to be finally tacking this.Can’t wait to see it finished.
Blessings,
Anne
Congratulations to the winners… looks like a great project. I love waking up to a good project, I should start one!
It was good to see you last weekend, we should try and get together sometime.
Blessings today
Rebecca
Hi Jennifer, great progress on your bathroom! It is soooo much work, I know, but so worth it in the end. I’ve just finished my own bathroom if you want to have a look! It’s vintage style with tongue and groove panelling! Still have to add some finishing touches but the major stuff is done! Didn’t realise how much work is involved in this kind of thing until we were half way through, but enjoying it now! Can’t wait to see your finished project 🙂
Sharon
Many congrats to those lucky ladies, they must be so excited!
Looking forward to seeing your bathroom redo.
Happy Friday~
T
Wow ~ that is a nice surprise, Jen! Thank you! We have found those types of things in the bathrooms in our homes, too. It’s funny how people can’t seem to get the toilet paper holder right and half the time they just leave the old holes or don’t spackle over them properly. I used to just get those stand alone holders at my old house. A fresh wall always looks so nice ~ even before you paint it or tile it.
Okay….seriously. Your new line is amazing. I have been pouring over all your creativity and I am amazed. Congrats on a job well done.
blessings,
karianne
Congrats to the ladies who won!!! Enjoy your goodies. What fun with the bathroom. We did ours last year and I don’t envy you the work but can’t wait to see the finish!!!
Progress is good! Glad things are coming along for you. Robyn
house projects—love them when they are DONE……{I’m a grump during the “during”!}
looks great so far!
warmest,
kara